Nikon COOLPIX S9600 driver and firmware
Related Nikon COOLPIX S9600 Manual Pages
Download the free PDF manual for Nikon COOLPIX S9600 and other Nikon manuals at ManualOwl.com
Product Manual - Page 6

...:
http://imaging.nikon.com/
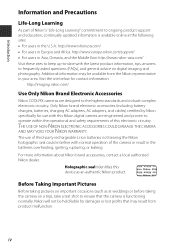
Use Only Nikon Brand Electronic Accessories
Nikon COOLPIX cameras are designed to the highest standards and include complex electronic circuitry. Only Nikon brand electronic accessories (including battery chargers, batteries, charging AC adapters, AC adapters, and cables) certified by Nikon specifically for use with this Nikon digital camera are engineered and...
Product Manual - Page 7

... manuals is accurate and complete, we would appreciate it were you to bring any errors or omissions to the attention of the Nikon representative in your area (address provided separately).
Notice Concerning Prohibition of Copying or Reproduction
Note that simply being in possession of material that was digitally copied or reproduced by means of a scanner, digital camera or other device...
Product Manual - Page 8

Introduction
Disposing of Data Storage Devices
Please note that deleting images or formatting data storage devices such as memory cards or built-in camera memory does not completely erase the original image data. Deleted files can sometimes be recovered from discarded storage devices using commercially available software, potentially resulting in the malicious use of personal image data. Ensuring...
Product Manual - Page 11

... not use wireless network functions while in the air. Follow the instructions of the hospital when using while in a hospital. The electromagnetic waves emitted by this camera may disrupt the electronic systems of the airplane or the instruments of the hospital. If you are using an Eye-Fi card, remove it from the camera before boarding an...
Product Manual - Page 12

... in the U.S.A., use an attachment plug adapter of the proper configuration for the power outlet if needed. The power supply unit is intended to be correctly orientated in a vertical or floor mount position.
not occur in a particular installation. If this equipment does cause harmful interference to radio or television reception, which can be determined by...
Product Manual - Page 19

Introduction
Installing the Software on the Smart Device 80 Connecting the Smart Device to the Camera 81
Connecting the Camera to a TV, Computer, or Printer 83
Connection Methods...83 Using ViewNX 2 ...85
Installing ViewNX 2 ...85 Transferring Images to the Computer 86 Viewing Images...88
Reference Section E1
Using Easy Panorama (Shooting and Playback E2 Shooting with Easy Panorama...E2 ...
Product Manual - Page 21

... TV Settings...E73 Charge by Computer...E74 Blink Warning...E75 Eye-Fi Upload...E76 Reset All...E77 Firmware Version ...E77 The Wi-Fi Options Menu E78 Error Messages...E80 File Names ...E84 Optional Accessories ...E85
Technical Notes and Index F1
Caring for the Product ...F2 The Camera...F2 The Battery ...F3 Charging AC Adapter ...F4 Memory Cards...F5
Cleaning and Storage...
Product Manual - Page 34
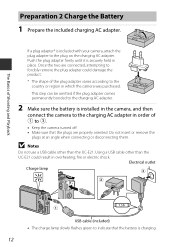

... battery is installed in the camera, and then
connect the camera to the charging AC adapter in order of 1 to 3.
• Keep the camera turned off. • Make sure that the plugs are properly oriented. Do not insert or remove the
plugs at an angle when connecting or disconnecting them.
B Notes
Do not use a USB cable other...
Product Manual - Page 40
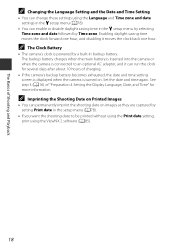

... is inserted into the camera or when the camera is connected to an optional AC adapter, and it can run the clock for several days after about 10 hours of charging.
• If the camera's backup battery becomes exhausted, the date and time setting screen is displayed when the camera is turned on. Set the date and time...
Product Manual - Page 87
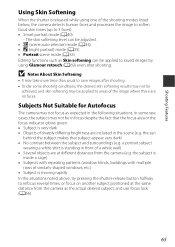

... is standing in front of a white wall) • Several objects are at different distances from the camera (e.g. the subject is
inside a cage) • Subjects with repeating patterns (window blinds, buildings with multiple
rows of similarly shaped windows, etc.) • Subject is moving rapidly In the situations noted above, try pressing the shutter-release...
Product Manual - Page 94
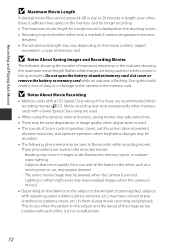

... being saved or while a movie is being recorded. Do not open the battery-chamber/memory card slot cover or remove the battery or memory card while an indicator is flashing. Doing this could result in loss of data, or in damage to the camera or the memory card.
B Notes About Movie Recording
• Memory cards with an SD Speed Class rating of...
Product Manual - Page 101
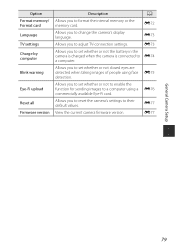

...Format memory/ Format card Language TV settings Charge by computer
Blink warning
Eye-Fi upload
Reset all Firmware version
Description
A
Allows you to format the internal memory or the memory card.
E72
Allows you to change the camera's display language.
E73
Allows you to adjust TV-connection settings.
E73
Allows you to set whether or not the battery in the camera is charged when the camera...
Product Manual - Page 102
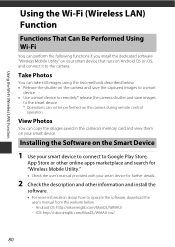

... cannot be performed on the camera during remote control
operation.
View Photos
You can copy the images saved in the camera's memory card and view them on your smart device.
Installing the Software on the Smart Device
1 Use your smart device to connect to Google Play Store,
App Store or other online apps marketplace and search for "Wireless Mobile Utility."
• Check the user...
Product Manual - Page 103
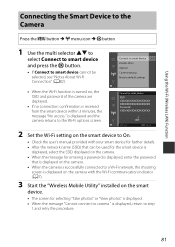

... setting on the smart device to On.
• Check the user's manual provided with your smart device for further details. • After the network name (SSID) that can be used for the smart device is
displayed, select the SSID displayed on the camera. • When the message for entering a password is displayed, enter the password
that is displayed on the camera. • When the camera...
Product Manual - Page 104
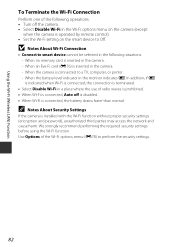

... operated by remote control). • Set the Wi-Fi setting on the smart device to Off.
B Notes About Wi-Fi Connection
• Connect to smart device cannot be selected in the following situations: - When no memory card is inserted in the camera. - When an Eye-Fi card (E76) is inserted in the camera. - When the camera is connected to a TV, computer, or printer. - When the...
Product Manual - Page 106
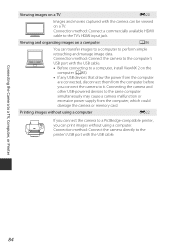

... HDMI cable to the TV's HDMI input jack.
Viewing and organizing images on a computer
A86
You can transfer images to a computer to perform simple retouching and manage image data. Connection method: Connect the camera to the computer's USB port with the USB cable. • Before connecting to a computer, install ViewNX 2 on the
computer (A85). • If any USB devices that draw the power...
Product Manual - Page 107
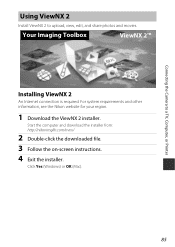

... the Camera to a TV, Computer, or Printer
Using ViewNX 2
Install ViewNX 2 to upload, view, edit, and share photos and movies.
Your Imaging Toolbox
ViewNX 2™
Installing ViewNX 2
An Internet connection is required. For system requirements and other information, see the Nikon website for your region.
1 Download the ViewNX 2 installer.
Start the computer and download the installer from...
Product Manual - Page 108
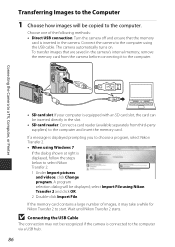

Connecting the Camera to a TV, Computer, or Printer
Transferring Images to the Computer
1 Choose how images will be copied to the computer.
Choose one of the following methods: • Direct USB connection: Turn the camera off and ensure that the memory
card is inserted in the camera. Connect the camera to the computer using the USB cable. The camera automatically turns on. To transfer images ...
Product Manual - Page 110

Connecting the Camera to a TV, Computer, or Printer
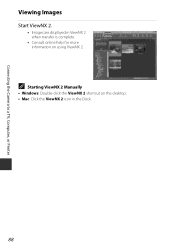
Viewing Images
Start ViewNX 2.
• Images are displayed in ViewNX 2 when transfer is complete.
• Consult online help for more information on using ViewNX 2.
C Starting ViewNX 2 Manually
• Windows: Double-click the ViewNX 2 shortcut on the desktop. • Mac: Click the ViewNX 2 icon in the Dock.
88
Product Manual - Page 142
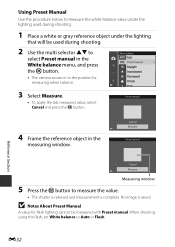

... the
measuring window.
Cancel Measure
Preset manual
Cancel Measure
Measuring window
5 Press the k button to measure the value.
• The shutter is released and measurement is complete. No image is saved.
B Notes About Preset Manual
A value for flash lighting cannot be measured with Preset manual. When shooting using the flash, set White balance to Auto or Flash.
Reference Section...

