Nikon COOLPIX P340 driver and firmware
Related Nikon COOLPIX P340 Manual Pages
Download the free PDF manual for Nikon COOLPIX P340 and other Nikon manuals at ManualOwl.com
Product Manual - Page 6

... information:
http://imaging.nikon.com/
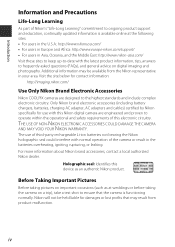
Use Only Nikon Brand Electronic Accessories
Nikon COOLPIX cameras are designed to the highest standards and include complex electronic circuitry. Only Nikon brand electronic accessories (including battery chargers, batteries, charging AC adapter, AC adapters and cables) certified by Nikon specifically for use with this Nikon digital camera are engineered and...
Product Manual - Page 7


... manuals is accurate and complete, we would appreciate it were you to bring any errors or omissions to the attention of the Nikon representative in your area (address provided separately).
Notice Concerning Prohibition of Copying or Reproduction
Note that simply being in possession of material that was digitally copied or reproduced by means of a scanner, digital camera or other device...
Product Manual - Page 8

Introduction
Disposing of Data Storage Devices
Please note that deleting images or formatting data storage devices such as memory cards or built-in camera memory does not completely erase the original image data. Deleted files can sometimes be recovered from discarded storage devices using commercially available software, potentially resulting in the malicious use of personal image data. Ensuring...
Product Manual - Page 11

... or other moving parts.
CD-ROMs
The CD-ROMs included with this device should not be played back on audio CD equipment. Playing CDROMs on an audio CD player could cause hearing loss or damage the equipment.
Particular care should be observed when photographing infants.
Do not operate the flash with the flash window touching a person or object Failure...
Product Manual - Page 12

... in the U.S.A., use an attachment plug adapter of the proper configuration for the power outlet if needed. The power supply unit is intended to be correctly orientated in a vertical or floor mount position.
not occur in a particular installation. If this equipment does cause harmful interference to radio or television reception, which can be determined by...
Product Manual - Page 19
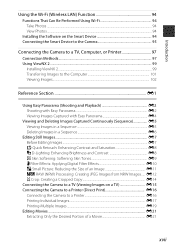

... Wi-Fi (Wireless LAN) Function 94
Functions That Can Be Performed Using Wi-Fi 94 Take Photos ...94 View Photos...94
Installing the Software on the Smart Device 94 Connecting the Smart Device to the Camera 95
Connecting the Camera to a TV, Computer, or Printer 97
Connection Methods...97 Using ViewNX 2 ...99
Installing ViewNX 2 ...99 Transferring Images to the Computer 101 Viewing Images...
Product Manual - Page 21
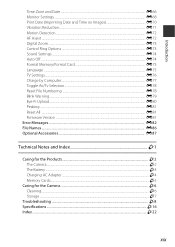

......E72 AF Assist ...E72 Digital Zoom ...E73 Control Ring Options ...E73 Sound Settings ...E74 Auto Off ...E74 Format Memory/Format Card E75 Language ...E75 TV Settings...E76 Charge by Computer...E77 Toggle Av/Tv Selection ...E78 Reset File Numbering ...E78 Blink Warning...E79 Eye-Fi Upload...E80 Peaking ...E81 Reset All ...E81 Firmware Version ...E81 Error Messages...E82 File Names ...E86...
Product Manual - Page 47
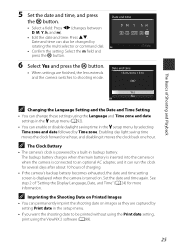

... to an optional AC adapter, and it can run the clock for several days after about 10 hours of charging.
• If the camera's backup battery becomes exhausted, the date and time setting screen is displayed when the camera is turned on. Set the date and time again. See step 2 of "Setting the Display Language, Date, and Time...
Product Manual - Page 82
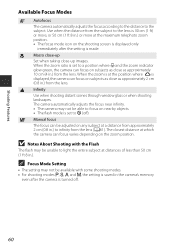

... displayed, the camera can focus on subjects as close as approximately 2 cm (0.8 in.) from the lens.
B Infinity Use when shooting distant scenes through window glass or when shooting landscapes. The camera automatically adjusts the focus near infinity. • The camera may not be able to focus on nearby objects. • The flash mode is set to W (off).
E Manual...
Product Manual - Page 101
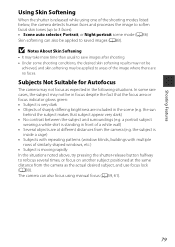

... shaped windows, etc.) • Subject is moving rapidly In the situations noted above, try pressing the shutter-release button halfway to refocus several times, or focus on another subject positioned at the same distance from the camera as the actual desired subject, and use focus lock (A80). The camera can also focus using manual...
Product Manual - Page 109
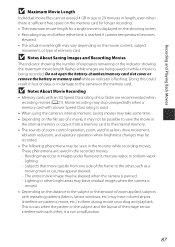

... being saved or while a movie is being recorded. Do not open the battery-chamber/memory card slot cover or remove the battery or memory card while an indicator is flashing. Doing this could result in loss of data, or in damage to the camera or the memory card.
B Notes About Movie Recording
• Memory cards with an SD Speed Class rating of...
Product Manual - Page 115
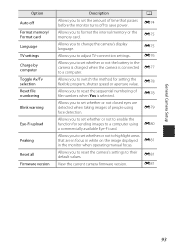

... memory/ Format card Language TV settings Charge by computer Toggle Av/Tv selection Reset file numbering
Blink warning
Eye-Fi upload
Peaking
Reset all Firmware version
Description
A
Allows you to set the amount of time that passes E74 before the monitor turns off to save power.
Allows you to format the internal memory or the memory card.
E75
Allows you to change the camera's display...
Product Manual - Page 116
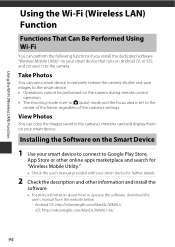

... performed on the camera during remote control
operation. • The shooting mode is set to A (auto) mode and the focus area is set to the
center of the frame, regardless of the camera's settings.
View Photos
You can copy the images saved in the camera's memory card and display them on your smart device.
Installing the Software on the Smart Device
1 Use your smart device to connect...
Product Manual - Page 117
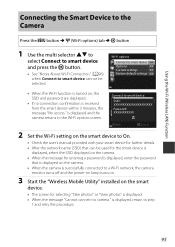

... the smart device is
displayed, select the SSID displayed on the camera. • When the message for entering a password is displayed, enter the password
that is displayed on the camera. • When the camera is successfully connected to a Wi-Fi network, the camera
monitor turns off and the power-on lamp turns on.
3 Start the "Wireless Mobile Utility" installed on the smart
device.
• The...
Product Manual - Page 118
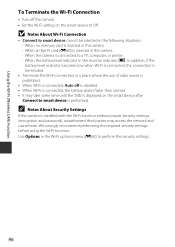

... off the camera. • Set the Wi-Fi setting on the smart device to Off.
B Notes About Wi-Fi Connection
• Connect to smart device cannot be selected in the following situations: - When no memory card is inserted in the camera. - When an Eye-Fi card (E80) is inserted in the camera. - When the camera is connected to a TV, computer, or printer. - When the...
Product Manual - Page 120
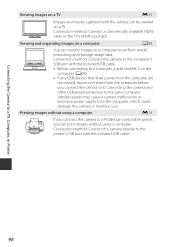

... HDMI cable to the TV's HDMI input jack.
Viewing and organizing images on a computer
A99
You can transfer images to a computer to perform simple retouching and manage image data. Connection method: Connect the camera to the computer's USB port with the included USB cable. • Before connecting to a computer, install ViewNX 2 on the
computer (A99). • If any USB devices that draw power...
Product Manual - Page 121
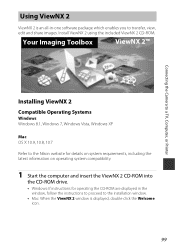

...an all-in-one software package which enables you to transfer, view, edit and share images. Install ViewNX 2 using the included ViewNX 2 CD-ROM.
Your Imaging Toolbox
ViewNX 2™
Connecting the Camera to a TV, Computer, or Printer
Installing ViewNX 2
Compatible Operating Systems
Windows Windows 8.1, Windows 7, Windows Vista, Windows XP
Mac OS X 10.9, 10.8, 10.7
Refer to the Nikon website for...
Product Manual - Page 122
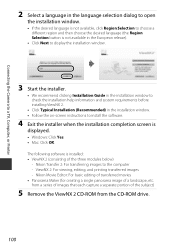

...) in the installation window. • Follow the on-screen instructions to install the software.
4 Exit the installer when the installation completion screen is
displayed.
• Windows: Click Yes. • Mac: Click OK.
The following software is installed: • ViewNX 2 (consisting of the three modules below)
- Nikon Transfer 2: For transferring images to the computer - ViewNX 2: For...
Product Manual - Page 123

Connecting the Camera to a TV, Computer, or Printer
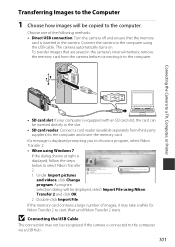
Transferring Images to the Computer
1 Choose how images will be copied to the computer.
Choose one of the following methods: • Direct USB connection: Turn the camera off and ensure that the memory
card is inserted in the camera. Connect the camera to the computer using the USB cable. The camera automatically turns on. To transfer images ...
Product Manual - Page 124

... the Camera to a TV, Computer, or Printer
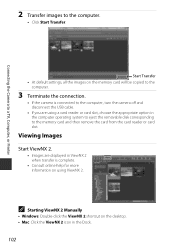
2 Transfer images to the computer.
• Click Start Transfer.
Start Transfer • At default settings, all the images on the memory card will be copied to the
computer.
3 Terminate the connection.
• If the camera is connected to the computer, turn the camera off and disconnect the USB cable.
• If you are using a card reader or card slot...

