Onkyo TX-NR5010 driver and firmware


Related Onkyo TX-NR5010 Manual Pages
Download the free PDF manual for Onkyo TX-NR5010 and other Onkyo manuals at ManualOwl.com
Owner Manual - Page 2

... apparatus in a built-in installation, such as a bookcase or rack, ensure that there is adequate ventilation. Leave 20 cm (8") of free space at the top and sides and 10 cm (4") at the rear. The rear edge of the shelf or board above the apparatus shall be set 10 cm (4") away from the rear...
Owner Manual - Page 3
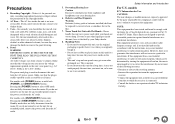
... this unit or its power cord while your hands are wet or damp. If water or any other liquid gets inside this unit, have it checked by your Onkyo dealer.
8. Handling Notes... limits for a Class B digital device, pursuant to Part 15 of the FCC Rules. These limits are designed to provide reasonable protection against harmful interference in a residential installation. This equipment generates, uses and...
Owner Manual - Page 5
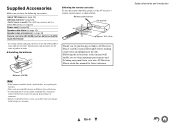
...) (North American models) Two AM loop antennas and two Indoor FM antennas are supplied. Power cord (➔ page 25) Speaker cable labels (➔ page 14) Speaker setup microphone (➔ page 43) Remote controller (RC-840M) and two batteries (AA/R6) Quick Start Guide
* In catalogs and on packaging, the letter at the end of the product...
Owner Manual - Page 6
... 95 Remote Control Codes for Onkyo Components Connected via RI 96 Resetting the REMOTE MODE Buttons 96 Resetting the Remote Controller 96 Controlling Other Components 96 Learning Commands 99 Using Normal Macros 100
Appendix
Troubleshooting 101 Firmware Update 107 Connection Tips and Video Signal Path 111 Using an RIHD-compatible TV, Player,
or Recorder 115 About HDMI 117 Network/USB...
Owner Manual - Page 15
... one cable to each speaker terminal. Doing so may damage the AV receiver.
• Don't connect one speaker to several terminals.
About Speakers A and Speakers B
Installing Speakers...Speakers A
SW1 SW2
SL SBL
SR SBR
2-1. Speaker Settings
Speaker Impedance Speakers Type(Front A) Speakers Type(Front B) Powered Zone 2 Powered Zone 3 11ch Playback
2-2. Speaker Configuration
Subwoofer Front Center ...
Owner Manual - Page 26
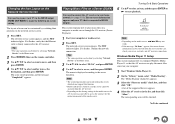
... the "Firmware Update Available" window appears.
When a new version of the firmware is available, the notification window "Firmware Update Available" pops up. This notification only appears when the AV receiver is connected to your home network (➔ page 118). To perform the firmware update, follow the instructions on screen.
Use R/X and ENTER on the AV receiver or remote controller to select...
Owner Manual - Page 34
... on the Network Service Screen
You need to connect your TV to the HDMI output (HDMI OUT MAIN) to make the following on-screen setting.
The layout of icons can be customized by switching their positions on the network service screen.
1 Press NET. The network service screen appears, and the NET indicator lights. If it flashes, verify that the Ethernet cable is firmly...
Owner Manual - Page 35

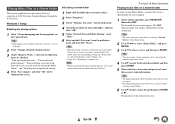
... on-screen information appears only on a TV that is connected to HDMI outputs.
Remote Playback means you can play the music files stored on a media server or personal computer with the AV receiver by operating the controller device in the home network.
Windows Media Player 12 Setup
This section explains how to configure Windows Media Player 12 so that the AV receiver...
Owner Manual - Page 36
..." is properly set. Note • When using NAS (Network Attached Storage), refer to the instruction manual provided with your NAS unit.
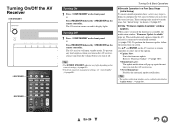
Turning On & Basic Operations
Playing music files on a shared folder
In order to enjoy Home Media, you must first create a shared folder on your computer.
1 On the remote controller, press RECEIVER followed by NET. The network service screen appears...
Owner Manual - Page 42
....
TV
EFG DBC
HI
: Listening area
Bto I: Listening position
Turning On & Basic Operations
Note
• Make the room as quiet as possible. Background noise and Radio Frequency Interference (RFI) can disrupt the room measurements. Close windows, televisions, radios, air conditioners, fluorescent lights, home appliances, light dimmers, or other devices. Turn off the cell phone (even...
Owner Manual - Page 53
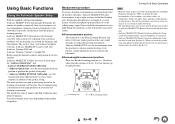
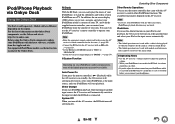
... network service screen. If you want to use the Internet radio services, use R/X/F/S to select the desired service. Pressing ENTER again switches to that selection. If you want to play music files on a server, use R/X/F/S to select "DLNA" and then press ENTER.
■ USB ` With this selection, you can play contents of portable players (iPod, etc.) and USB storage devices...
Owner Manual - Page 86
... see "If the "Firmware
Update Available" window appears." (➔ page 26).
Initial Setup
If you skipped the initial setup wizard, for example on first-time use, you can reaccess it from here. See "Initial Setup" (➔ page 27).
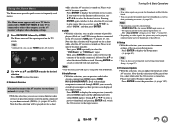
Remote Controller Setup
1
2
3
4
5
"Setup"
Main Menu
Remote ID
Remote Controller Setup
■ Remote ID ` 1, 2, or 3
When several Onkyo components are used...
Owner Manual - Page 92
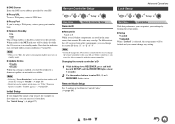
... Onkyo Dock components, update your iPod/iPhone with the latest software, available from the Apple web site. For supported iPod/iPhone models, see the instruction manual of the Onkyo Dock.
RI Dock
With the RI Dock, you can easily play the music of your iPod/iPhone, or watch the slideshows and videos of your iPod/iPhone on a TV...
Owner Manual - Page 105
... possible with some USB devices even if they conform to the USB mass storage device class. USB memory devices with security functions cannot - be played.
Others
■ Standby power consumption
In the following cases, the power consumption in 83, 84,
standby mode may reach up to a maximum of
86
12.5 W:
- The "HDMI Control(RIHD)" setting is set to
"On". (Depending on the TV status, the...
Owner Manual - Page 107
... carefully.
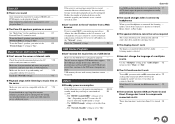
■ Update via network You need a wired Internet connection to update the firmware.
■ Update via USB storage (➔ page 109) Please prepare a USB storage device such as a USB flash memory stick. You need at least 32 MB of available space to update the firmware.
Note
• Check the network connection before updating. • Do not touch any cable or device connected to...
Owner Manual - Page 108
... with an Ethernet cable.
• Make sure your router is configured properly.
See the instruction manual of the router.
• If your network allows only one client
connection and there is any other device
already connected, the AV receiver will not be able to access the network. Consult your Internet Service Provider (ISP). • If your modem does not function as a router, you...
Owner Manual - Page 109
... displayed. It takes 20 to 30 seconds to recognize the USB device.
7 Press RECEIVER followed by HOME on the remote controller. The Home menu appears on the TV screen.
8 Select "Firmware Update" and press ENTER.
Appendix
9 Select "Update via USB" and press ENTER. Note that this option will not be available if there is no firmware file newer than the currently installed version...
Owner Manual - Page 110
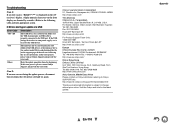
...front display are denoted by asterisks.) Refer to the following table and take appropriate action.
■ Errors during an update via USB
Error Code *-10, *-20 *-14
Others
Description
The USB device was not detected. Make sure the USB flash memory or USB cable is properly connected to the USB port. If the USB storage device has its own power supply, use it to power the USB device.
The firmware...
Owner Manual - Page 119

... be displayed.
• If you connect a USB hard disk drive to the AV receiver's USB port, we recommend that you use its AC adapter to power it.
• The AV receiver supports USB MP3 players that support the USB Mass Storage Class standard, which allows USB devices to be connected to computers without the need for special drivers or software. Note that not all USB MP3 players support the USB...
Owner Manual - Page 121
...of this device or its compliance with safety and regulatory standards. Please note that the use of this accessory with iPod or iPhone may affect wireless performance. Apple TV is a...trademarks of iBiquity Digital Corp. "DLNA®, the DLNA Logo and DLNA CERTIFIED™ are trademarks, service marks, or certification marks of the Digital Living Network Alliance." Windows and the Windows logo are ...