Toshiba PA5082U-1PRP dynadock V3.0 driver and firmware
Drivers and firmware downloads for this Toshiba item

Related Toshiba PA5082U-1PRP dynadock V3.0 Manual Pages
Download the free PDF manual for Toshiba PA5082U-1PRP dynadock V3.0 and other Toshiba manuals at ManualOwl.com
User's Guide for dynadock V3.0 - Page 3
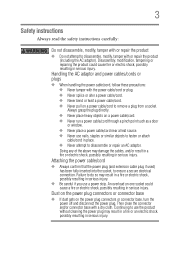
... read the safety instructions carefully:
Do not ...power cable/cord. ❖ Never bend or twist a power cable/cord. ❖ Never pull on a power cable/cord to remove a plug from a socket. Always grasp the plug directly. ❖ Never place heavy objects on a power cable/cord. ❖ Never run a power cable/cord through a pinch point such as a door or window. ❖ Never place a power cable...
User's Guide for dynadock V3.0 - Page 5

... Conformity Information"
This equipment has been tested and found to comply with the limits for a Class B digital device, pursuant to part 15 of the FCC rules. These limits are designed to provide reasonable protection against harmful interference in a residential installation. This equipment generates, uses and can radiate radio frequency energy and, if not...
User's Guide for dynadock V3.0 - Page 7

7
Trademarks
dynadock is a trademark of Toshiba Corporation. AMD, AMD K6, Athlon and Duron are registered trademarks or trademarks of Advanced Micro Devices Incorporated.
DisplayLink is a trademark of DisplayLink Corporation.
The terms HDMI and HDMI High-Definition Multimedia Interface, and the HDMI Logo are trademarks or registered trademarks of HDMI Licensing LLC in the United States and other ...
User's Guide for dynadock V3.0 - Page 8
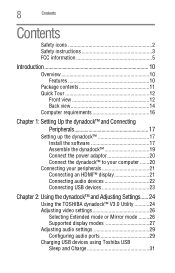
... 17
Setting up the dynadock 17 Install the software 17 Assemble the dynadock 19 Connect the power adaptor 20 Connect the dynadock™ to your computer .......20
Connecting your peripherals 21 Connecting an HDMI™ display 21 Connecting audio devices 22 Connecting USB devices 23
Chapter 2: Using the dynadock™ and Adjusting Settings...... 24
Using the TOSHIBA dynadock™ V3...
User's Guide for dynadock V3.0 - Page 10

... you keep your dynadock™ up-to-date by visiting support.toshiba.com periodically to download updated software drivers.
NOTE
All instructions in this Guide are for Windows® 7 systems unless otherwise noted.
Overview
Features
❖ Single USB cable connection to your computer ❖ Upright slim design saves desktop space ❖ Easily accessible USB and audio ports located on...
User's Guide for dynadock V3.0 - Page 11
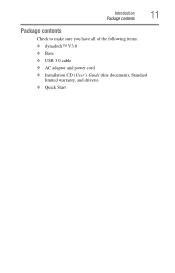
Introduction Package contents
11
Package contents
Check to make sure you have all of the following items: ❖ dynadock™ V3.0 ❖ Base ❖ USB 3.0 cable ❖ AC adaptor and power cord ❖ Installation CD (User's Guide (this document), Standard
limited warranty, and drivers) ❖ Quick Start
User's Guide for dynadock V3.0 - Page 16

...
Component CPU
Memory USB interface Disk space Operating system
Description
1.8 GHz or higher processor (Intel® Core™ 2 Duo, or Intel® Pentium® family, or AMD K10 family, or compatible processor recommended. Intel® Core™ 2 Duo 2.0 GHz or higher processor recommended for optimal video performance)
2 GB memory or higher (4 GB or more recommended)
USB 3.0 or 2.0 port...
User's Guide for dynadock V3.0 - Page 17
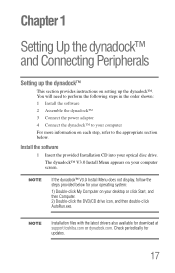
...; V3.0 Install Menu does not display, follow the steps provided below for your operating system:
1) Double-click My Computer on your desktop or click Start, and then Computer. 2) Double-click the DVD/CD drive icon, and then double-click AutoRun.exe.
NOTE
Installation files with the latest drivers also available for download at support.toshiba.com or dynadock.com. Check periodically for updates...
User's Guide for dynadock V3.0 - Page 18
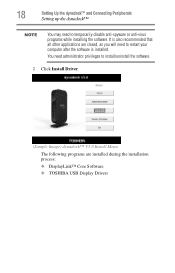
... other applications are closed, as you will need to restart your computer after the software is installed.
You need administrator privileges to install/uninstall the software.
2 Click Install Driver.
(Sample Image) dynadock™ V3.0 Install Menu
The following programs are installed during the installation process: ❖ DisplayLink™ Core Software ❖ TOSHIBA USB Display Drivers
User's Guide for dynadock V3.0 - Page 19

...the dynadock™ and Connecting Peripherals
19
Setting up the dynadock™
3 Follow the on-screen instructions to finish the installation.
NOTE
You will need to read and accept the TOSHIBA software license agreement when prompted, to proceed with the installation.
4 Restart your computer if prompted.
NOTE
Complete the software installation process before connecting the dynadock™...
User's Guide for dynadock V3.0 - Page 20

... the square end of the provided USB cable into the USB type B connector on the back of the dynadock™.
PA5082U-1PRP
19V Made
2.37A in China
/
Fabrique
en
Chine
(Sample Illustration) Connecting the 3.0 USB cable
2 Connect the other end of the USB cable to an available USB port on your computer.
Windows® automatically detects the device and installs appropriate device drivers.
User's Guide for dynadock V3.0 - Page 23

...docked computer before connecting a USB device.
To connect a USB device to the dynadock™:
1 If your device came with its own AC adaptor, connect the AC adaptor to the device and to a live electrical outlet.
2 Use a USB cable to connect the device to one of the USB ports on the dynadock™.
3 Wait for Windows® to recognize the device and install the drivers. A message should display...
User's Guide for dynadock V3.0 - Page 24
...
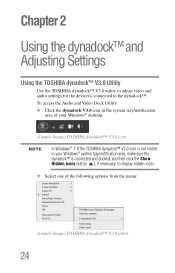
Use the TOSHIBA dynadock™ V3.0 utility to adjust video and audio settings for the device(s) connected to the dynadock™. To access the Audio and Video Dock Utility: ❖ Click the dynadock V3.0 icon in the system tray/notification
area of your Windows® desktop.
(Sample Image) TOSHIBA dynadock™ V3.0 icon
NOTE
In Windows® 7, If the TOSHIBA dynadock™ V3.0 icon...
User's Guide for dynadock V3.0 - Page 25

Using the dynadock™ and Adjusting Settings
25
Using the TOSHIBA dynadock™ V3.0 Utility
Option Check for updates dynadock™ V3.0
Audio Setup Video Setup
Use this option to:
Performs a check to see if you have the latest software installed.
Screen Resolution: Changes the resolution setting of the external display connected to the dynadock™.
Screen Rotation: Rotates the ...
User's Guide for dynadock V3.0 - Page 26

... settings based on your computer's settings.
To configure the dynadock's video output signal to Mirror mode or Extended mode, connect an external display to the dynadock™ as described in the section "Connecting an HDMI™ display" on page 21, and then follow the steps below:
1 Click the dynadock V3.0 icon in the system tray/notification area of your Windows® desktop...
User's Guide for dynadock V3.0 - Page 27
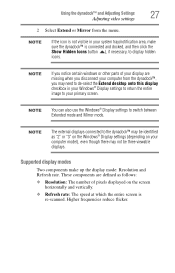
... between Extended mode and Mirror mode.
NOTE
The external displays connected to the dynadock™ may be identified as "2" or "3" on the Windows® Display settings (depending on your
computer model), even though there may not be three viewable
displays.
Supported display modes
Two components make up the display mode: Resolution and Refresh rate. These components are defined as follows...
User's Guide for dynadock V3.0 - Page 29

...need to manually adjust the audio settings in Windows®, as described in this section. If you want to use the computer's audio ports while the computer is docked, you will need to change the default settings.
Configuring audio playback ports
1 Click the dynadock V3.0 icon in the system tray/notification area of your Windows® desktop.
(Sample Image) TOSHIBA dynadock™ V3.0 icon
NOTE...
User's Guide for dynadock V3.0 - Page 33

... it is important that you investigate other sources of assistance first. Try the following, before contacting Toshiba: ❖ Review the User's Guide and/or troubleshooting sections in the
documentation supplied with your software and/or external devices. ❖ Visit support.toshiba.com for regularly updated support and complete documentation. ❖ If a problem occurs when you are running...
User's Guide for dynadock V3.0 - Page 34

... to regularly check the Toshiba Web site at support.toshiba.com.
Toshiba voice contact
Before calling Toshiba, make sure you have: ❖ Your dynadock's serial number ❖ The computer and any optional devices related to the problem ❖ Backup copies of your Windows® operating system and all
other preloaded software on your choice of media ❖ Name and version of the program...
User's Guide for dynadock V3.0 - Page 38

... jack 13 security lock slot 15 USB 2.0 15 USB 3.0 (USB Sleep and Charge
port) 13 USB Type B connector, USB 3.0
15 power light 13 power requirements
dynadock™ 35
Q
Quick Tour 12 back view 14 front view 12
S
safety icons 2 instructions 3
security lock slot 15 setting up
the dynadock™ 17 settings
audio playback 29 audio recording 30 software install 17 specifications 35 standby/sleep...