Toshiba PA3974U-1C8K Camileo X416 driver and firmware
Drivers and firmware downloads for this Toshiba item


Related Toshiba PA3974U-1C8K Camileo X416 Manual Pages
Download the free PDF manual for Toshiba PA3974U-1C8K Camileo X416 and other Toshiba manuals at ManualOwl.com
User Guide - Page 2

...: Camcorder Model number: CAMILEO® X400 Series
FCC notice "Declaration of Conformity Information"
This equipment has been tested and found to comply with the limits for a Class B digital device, pursuant to part 15 of the FCC rules. These limits are designed to provide reasonable protection against harmful interference in a residential installation. This equipment generates...
User Guide - Page 4

... shortened.
❖ Never install or remove the battery without first turning off the power and disconnecting the AC adaptor.
❖ Only use the supplied AC adaptor or USB cable, or an optional Toshiba battery charger to charge the battery. Never attempt to charge the battery with any other charger.
About the remote control battery
Chemical burns and...
User Guide - Page 6
...
CAMILEO is a registered trademark of Toshiba America Information Systems, Inc. and/or Toshiba Corporation. Adobe and Adobe Reader are either registered trademarks or trademarks of Adobe Systems Incorporated in the United States and/or other countries. ArcSoft, MediaImpression, and MediaConverter are registered trademarks of ArcSoft, Inc. Facebook is a registered trademark of Facebook Inc. HDMI...
User Guide - Page 9
... photos or videos to a computer..........60
Chapter 8: Uploading Video and Photo Files to the Internet 61
CAMILEO® Uploader 62 Setting up your account information for a Web site 64
Chapter 9: Webcam Mode 66
Chapter 10: Specifications 67
Operating Environment Conditions 68
Chapter 11: Troubleshooting 69
Chapter 12: Other Information 71
Toshiba Support 71 Before you call...
User Guide - Page 10
... connectivity via a mini HDMI™ cable ❖ Built-in CAMILEO® Uploader, allowing you to easily upload
videos captured by the camcorder to the Internet (for Windows® based systems only) ❖ Various effect options, such as Time Lapse and Slow Motion ❖ Built-in memory allowing you to take pictures and to record movies without a memory card.
10
User Guide - Page 11

... memory is used for Firmware to operate the camcorder.
❖ Memory card slot allowing you to increase storage capacity.
Check the components
Unpack the box and make sure all items listed below are included:
Camcorder Mini USB cable Mini HDMI™ cable AC adaptor
Lithium-ion rechargeable
battery*
Lens cover set (lens cover and strap)
Quick Start
CD-ROM Cleaning cloth
Guide Software...
User Guide - Page 14
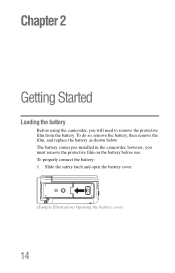
Chapter 2
Getting Started
Loading the battery
Before using the camcorder, you will need to remove the protective film from the battery. To do so, remove the battery, then remove the film, and replace the battery as shown below. The battery comes pre-installed in the camcorder, however, you must remove the protective film...
User Guide - Page 19

... Started
19
Loading the battery...to do so could possibly result in serious injury.
Inserting the battery
❖ When installing a battery or before moving the product, always make sure the battery is inserted ... become impaired, or after the warning message indicating that the battery power is exhausted has been displayed.
Continued use of an exhausted or impaired battery could result in the...
User Guide - Page 20

... battery life might be shortened.
❖ Never install or remove the battery without first turning off the power and disconnecting the AC adaptor.
Inserting and removing an SD™ Card (optional)
NOTE An SD™ Card may need to be purchased separately.
Your camcorder comes with internal memory that allows you to store pictures and...
User Guide - Page 45

... in the built-in
No
memory (when no SD™ Card is installed), or do not
delete all photos and videos on the installed SD™ Card.
Operation
1 In the Delete menu, touch the Delete All icon twice.
2 Touch to select the desired option.
3 Touch again to validate the new setting.
4 Touch the Return/Exit ( ) icon...
User Guide - Page 51

...
NOTE
❖ When an SD™ Card has been installed, only the photos and videos stored on the card are deleted.
❖ Videos or photos cannot be deleted if the card is write-protected.
Video Trim
Use this option to trim the beginning and/or end of the recorded video and save it as a new...
User Guide - Page 54

... and videos in the built-in
NO
memory (when no SD™ Card is installed), or do not
delete all photos and videos on the installed SD™ Card.
Operation
1 In the Setup menu, touch the Format icon twice.
2 Touch to select the desired option.
3 Touch again to validate the setting.
4 Touch the Return/Exit ( ) icon twice...
User Guide - Page 59

...to the Internet easily.
❖ Adobe® Reader® is a popular program that is needed to view the User's Manual. Many users will find they already have this software installed on their computer.
To install the bundled software:
1 Insert the CD-ROM into your computer's optical disc drive. The autorun screen appears.
2 Click "Install Application Software". Follow the onscreen instructions to...
User Guide - Page 60
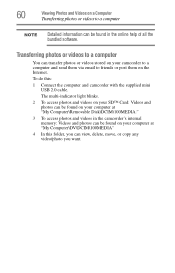
... on the Internet.
To do this:
1 Connect the computer and camcorder with the supplied mini USB 2.0 cable.
The multi-indicator light blinks.
2 To access photos and videos on your SD™ Card: Videos and photos can be found on your computer at "My Computer\Removable Disk\DCIM\100MEDIA."
3 To access photos and videos in the camcorder's internal memory: Videos...
User Guide - Page 61

..., allowing you to share them with your family and friends on these Web sites. The bundled software, ArcSoft MediaImpression®, can also be used to upload video clips to these Web sites. NOTE You must have Internet access to upload videos to a Web site. NOTE CAMILEO Uploader for Windows® based systems only.
61
User Guide - Page 62

... Video and Photo Files to the Internet
CAMILEO® Uploader
CAMILEO® Uploader
To upload files to the Internet:
1 Connect the camcorder to the computer by using the supplied USB cable.
(Sample Illustration) Connecting the camcorder to a computer
2 When the USB connection has been made, the CAMILEO® Uploader application AutoPlay window appears on your computer screen. (If the AutoPlay...
User Guide - Page 67

...
Video resolution
5 Megapixel BSI CMOS sensor Video record, Photo record, Webcam 23x Optical zoom Auto focus lens (F3.5 - 4.1) Macro mode: wide: 0.39" (1cm) ~ 47.24" (120cm)
Normal mode: 0.39" (1cm) ~ infinity 1x ~ 120x (120x Digital zoom) Electronic 3" (7.6 cm) LCD touch screen (16:9) CAMILEO® X400: Built-in 128MB memory (partial memory is used for firmware code). CAMILEO® X416: Built...
User Guide - Page 70

70
Troubleshooting
5 After connecting the USB cable to the computer:
❖ "DV" indicates the internal memory of the camcorder. ❖ "Removable Disk" indicates the external memory
(SD/SDHC/SDXC card installed in the camcorder) (path will vary depending on name of SD™ Card). ❖ "DVAP" indicates the built-in CAMILEO® Uploader (for Windows® based systems only).
Do not ...
User Guide - Page 71
... other sources of assistance first. Try the following before contacting Toshiba: ❖ Review the documentation supplied with your product. ❖ If a problem occurs when you are running software
applications, consult the software documentation for troubleshooting suggestions. Contact the software company's technical support department for assistance. ❖ Consult the reseller or dealer...
User Guide - Page 72

... most recent software and hardware options for your CAMILEO® product and for other product information, be sure to regularly check the Toshiba Web site at www.support.toshiba.com.
Toshiba voice contact
For technical support, call the Toshiba Customer Support Center: Within the United States at (888) 592-0944 Outside the United States at (949) 583-3305
Toshiba Phone Service Center...