Toshiba PA3906U-1C1R Camileo Air10 4GB SD Card driver and firmware
Drivers and firmware downloads for this Toshiba item

Related Toshiba PA3906U-1C1R Camileo Air10 4GB SD Card Manual Pages
Download the free PDF manual for Toshiba PA3906U-1C1R Camileo Air10 4GB SD Card and other Toshiba manuals at ManualOwl.com
User Guide - Page 2

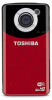
... Name: Camcorder Model number: CAMILEO® AIR10
FCC notice "Declaration of Conformity Information"
This equipment has been tested and found to comply with the limits for a Class B digital device, pursuant to part 15 of the FCC rules. These limits are designed to provide reasonable protection against harmful interference in a residential installation. This equipment generates, uses...
User Guide - Page 3
3
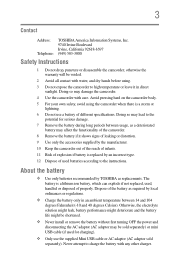
Contact
Address: Telephone:
TOSHIBA America Information Systems, Inc. 9740 Irvine Boulevard Irvine, California 92618-1697 (949) 583-3000
Safety Instructions
1 Do not drop,...install or remove the battery without first turning OFF the power and disconnecting the AC adaptor (AC adaptor may be sold separately) or mini USB cable (if used for charging).
❖ Only use the supplied Mini USB cable...
User Guide - Page 5
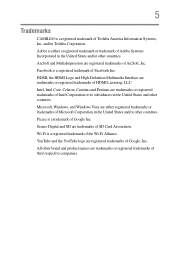
... its subsidiaries in the United States and other countries. Microsoft, Windows, and Windows Vista are either registered trademarks or trademarks of Microsoft Corporation in the United States and/or other countries. Picasa is a trademark of Google Inc. Secure Digital and SD are trademarks of SD Card Association. Wi-Fi is a registered trademark of the Wi-Fi...
User Guide - Page 7

... 5: Camcorder Settings 45
Setup menu 45 Menu Sound 46 TV 46 Language 47 Time settings 47 Format 48 Default setting 49
Chapter 6: CAMILEO® AIR10 Connect 50
Advanced operations on your computer (CAMILEO® AIR10 Connect 50
Installing CAMILEO® AIR10 Connect 50 Using CAMILEO® AIR10 Connect via Wi-Fi®
(Infrastructure mode 52 Using CAMILEO AIR10 Connect via USB 55...
User Guide - Page 8
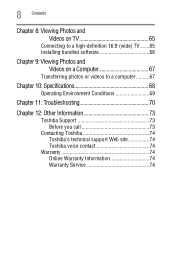
...16:9 (wide) TV.......65 Installing bundled software 66
Chapter 9: Viewing Photos and Videos on a Computer 67
Transferring photos or videos to a computer..........67
Chapter 10: Specifications 68
Operating Environment Conditions 69
Chapter 11: Troubleshooting 70
Chapter 12: Other Information 73
Toshiba Support 73 Before you call 73
Contacting Toshiba 74 Toshiba's technical support Web site...
User Guide - Page 9
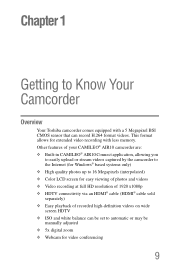
... photos and videos ❖ Video recording at full HD resolution of 1920 x1080p ❖ HDTV connectivity via an HDMI® cable (HDMI® cable sold separately) ❖ Easy playback of recorded high-definition videos on wide screen HDTV ❖ ISO and white balance can be set to automatic or may be manually adjusted ❖ 5x digital zoom ❖ Webcam for...
User Guide - Page 10
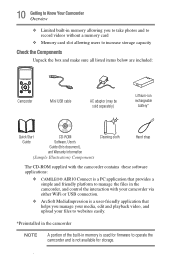
... to take photos and to record videos without a memory card
❖ Memory card slot allowing users to increase storage capacity
Check the Components
Unpack the box and make sure all listed items below are included:
MENU OK
Camcorder
Mini USB cable
AC adaptor (may be sold separately)
Lithium-ion rechargeable
battery*
Quick Start
CD-ROM
Guide
Software, User's
Guide (this document),
and...
User Guide - Page 11

... to Know Your Camcorder Overview
System Requirements
❖ Microsoft® Windows® XP/Windows Vista®/Windows® 7 ❖ Intel/AMD Dual-Core CPU or above ❖ 1 GB system memory ❖ 2 GB free HDD space ❖ 4x CD-ROM Drive ❖ Available USB 2.0 port ❖ 16-bit color display ❖ Wi-Fi® capability
NOTE
The LCD screen is manufactured...
User Guide - Page 14

Chapter 2
Getting Started
Charging the battery
The battery comes pre-installed in the camcorder, and must be charged before use, however you must remove the protective film on the battery. 1 Slide the battery cover off.
(Sample Illustration) Front view 2 Remove the battery.
14
User Guide - Page 19
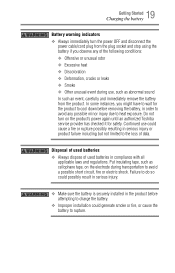
...10070; Always immediately turn the power OFF and disconnect the
power cable/cord plug from the plug ...heat exposure. Do not turn on the product's power again until an authorized Toshiba service provider has checked it for safety. Continued use ...battery is securely installed in the product before attempting to charge the battery.
❖ Improper installation could generate smoke or fire, or...
User Guide - Page 20

...by local ordinances or regulations. Use only batteries recommended by TOSHIBA as replacements.
❖ Charge the battery only in an... be shortened.
❖ Never install or remove the battery without first turning OFF the power and disconnecting the AC adaptor (AC...after the warning message indicating that the battery power is exhausted has been displayed.
Continued use of an exhausted or impaired ...
User Guide - Page 43
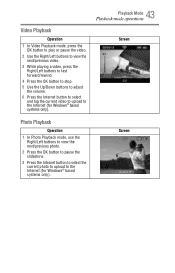
.../rewind.
4 Press the OK button to stop.
5 Use the Up/Down buttons to adjust the volume.
6 Press the Internet button to select and tag the current video to upload to the Internet (for Windows® based systems only).
43 Playback Mode
Playback mode operations
Screen
Photo Playback
Operation
1 In Photo Playback mode, use...
User Guide - Page 50

... your
computer ❖ Use the camcorder as a wireless webcam for online video
chatting ❖ Configure your account information on social networking sites
and save them to the camcorder ❖ Synchronize your Wi-Fi® profile with your camcorder and set
up a security password to open the CAMILEO® AIR10 Connect application via Wi-Fi® connection
Installing CAMILEO® AIR10...
User Guide - Page 51
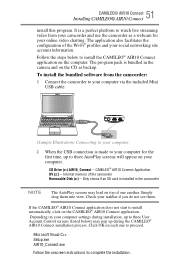
...) Connecting to your computer
2 When the USB connection is made to your computer for the first time, up to three AutoPlay screens will appear on your computer.
CD Drive (x:) AIR10_Connect -- CAMILEO® AIR10 Connect Application DV (x:) -- Internal memory of the camcorder Removable Disk (x:) -- Only shows if an SD card is installed in the camcorder
NOTE
The AutoPlay screens may load on top of...
User Guide - Page 52

... from the included CD:
1 Insert the CD into your computer's optical disk drive. The AutoPlay screen appears.
2 Click Install CAMILEO® AIR10 Connect to install the application.
NOTE
❖ If ArcSoft MediaImpression® is not installed, the CAMILEO® AIR10 Connect program will install the H.264 Codec (ffdshow-a free software under GPL license) to view videos correctly.
❖ In...
User Guide - Page 53

...on the same wireless network, and that you have already installed the CAMILEO® AIR10 Connect application on your computer.
4 Double-click on the shortcut for CAMILEO® AIR10 Connect on the Windows® desktop.
The camcorder connects to your computer and the CAMILEO® AIR10 Connect main screen displays on your computer screen.
NOTE: If more than one Wi-Fi® device is connected to...
User Guide - Page 55
55 CAMILEO® AIR10 Connect
Using CAMILEO AIR10 Connect via USB
NOTE
❖ ACCOUNT SETUP and Wi-Fi SETUP are not available during Wi-Fi® connection.
❖ For Wi-Fi® connectivity to work correctly, make sure the bundled CAMILEO® AIR10 Connect (for Windows® based systems only) is installed and the wireless LAN module on your computer is activated.
❖ Make sure...
User Guide - Page 58

... files to social networking sites ❖ Broadcast live streaming on USTREAM Web site On your computer, with the CAMILEO® AIR10 Connect application (Windows® based systems only), you can: ❖ Download the files from the camcorder to your computer ❖ Watch live streaming video from the camcorder on your
computer ❖ Use the camcorder as a wireless webcam for...
User Guide - Page 66

... cable, or vice versa.
NOTE
The LCD screen does not display when the camcorder is connected to an HDTV.
NOTE
Some functions may not be accessible while the camcorder is connected to an HDTV.
Installing bundled software
The CD-ROM supplied with your camcorder contains two software applications.
To install the bundled software:
1 Insert the CD-ROM into your computer's optical...
User Guide - Page 67

... email to friends or post them on the Internet.
To do this:
1 Connect the computer and camcorder with the supplied mini USB 2.0 cable.
The multi-indicator light blinks.
2 To access photos and videos on your SD™ Card: Videos and photos can be found on your computer at "My Computer\SD\DCIM\100MEDIA (path will vary depending on name...