Toshiba PA3778U-1PRP dynadock V driver and firmware
Drivers and firmware downloads for this Toshiba item

Related Toshiba PA3778U-1PRP dynadock V Manual Pages
Download the free PDF manual for Toshiba PA3778U-1PRP dynadock V and other Toshiba manuals at ManualOwl.com
User Guide - Page 9

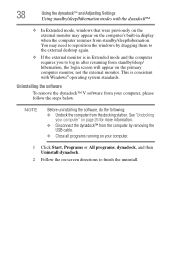
... Extended mode or Mirror mode ........32 Supported display modes 33 Adjusting audio settings 35 Configuring audio ports 35 Charging USB devices 37 Using standby/sleep/hibernation modes with the dynadock 37 Uninstalling the software 38
Chapter 3: Troubleshooting and Support 39
Troubleshooting 39 Power 40 Display/Video 41 Audio/sound 45 Connection/Docking 46 Network 46 USB 46 Other 47
User Guide - Page 11

Introduction
Thank you for purchasing the dynadock™ V, the universal docking station that enables you to connect your computer peripherals through a single USB cable to just about any Windows®-based computer. We recommend that you keep your dynadock™ up-to-date with the latest technological advances: visit pcsupport.toshiba.com periodically to download updated software drivers.
11
User Guide - Page 12

...8482; settings
Charges your USB peripherals with the front powered USB port even when the connected computer is off
Box contents
Check to make sure you have all of the following items: ❖ dynadock™ ❖ Base ❖ USB 2.0 cable ❖ AC adaptor ❖ DVI-I to VGA adaptor ❖ Installation CD (contains the User's Manual (this document),
drivers and the dynadock™...
User Guide - Page 18
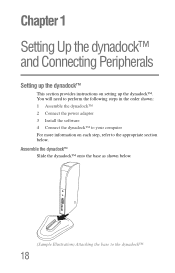
Chapter 1
Setting Up the dynadock™ and Connecting Peripherals
Setting up the dynadock™
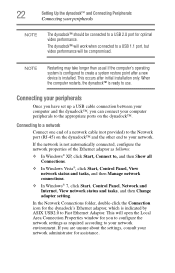
This section provides instructions on setting up the dynadock™. You will need to perform the following steps in the order shown: 1 Assemble the dynadock™ 2 Connect the power adaptor 3 Install the software 4 Connect the dynadock™ to your computer For more information on each step, ...
User Guide - Page 19
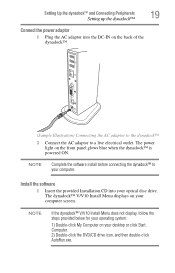
... glows blue when the dynadock™ is powered ON.
NOTE
Complete the software install before connecting the dynadock™ to your computer.
Install the software
1 Insert the provided Installation CD into your optical disc drive. The dynadock™ V/V10 Install Menu displays on your computer screen.
NOTE
If the dynadock™ V/V10 Install Menu does not display, follow the steps provided...
User Guide - Page 20

...to restart your computer after the software is installed. You need administrator privileges to install/uninstall the software.
2 Click Setup.
(Sample Image) dynadock™ V/V10 Install Menu 3 Click Install to install all of the listed programs.
NOTE
If the previous version drivers are already installed, uninstall them and then re-install the new drivers.
(Sample Image) dynadock™ V/V10...
User Guide - Page 21
...™ and Connecting Peripherals
21
Setting up the dynadock™
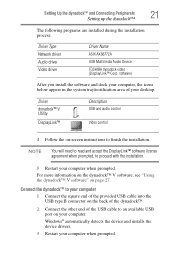
The following programs are installed during the installation process:
Driver Type Network driver Audio driver Video driver
Driver Name ASIX AX88772A
USB Multimedia Audio Device
TOSHIBA dynadock video (DisplayLink™ Corp. software)
After you install the software and dock your computer, the icons below appear in the...
User Guide - Page 22
... Start, Control Panel, View network status and tasks, and then Manage network connections.
❖ In Windows® 7, click Start, Control Panel, Network and Internet, View network status and tasks, and then Change adapter setting.
In the Network Connections folder, double-click the Connection icon for the dynadock's Ethernet adaptor, which is indicated by ASIX USB2.0 to Fast Ethernet Adaptor...
User Guide - Page 25
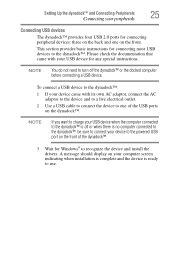
...charge your USB device when the computer connected to the dynadock™ is off or when there is no computer connected to the dynadock™, be sure to connect your device to the powered USB port on the front of the dynadock™.
3 Wait for Windows® to recognize the device and install the drivers. A message should display on your computer screen indicating when installation is complete...
User Guide - Page 27

... displays Safe to Remove Hardware.
(Sample Image) Undocking in progress
3 It is now safe to disconnect the USB cable connecting your computer to the dynadock™.
Using the dynadock™ V software
This section provides information on using the following software to manage the dynadock™ and adjust settings to suit your needs:
❖ The background utility ❖ TOSHIBA dynadock...
User Guide - Page 28
... your audio ports. For more information, see "Adjusting audio settings" on page 35.
Connect to Toshiba support Web sites to obtain updated drivers, find answers to frequently asked questions, and more.
Turn notification messages ON or OFF.
View the dynadock™ V User's Manual (this document) on your computer screen.
Find the version number for the TOSHIBA dynadock™ V Utility software...
User Guide - Page 29

... warning message.
A message will also display to notify you when undocking is complete and it is safe to disconnect your computer from the dynadock™.
To turn messages ON or OFF:
1 Click the TOSHIBA dynadock Utility icon in your Windows® system tray/notification area.
(Sample Image) TOSHIBA dynadock™ V Utility icon
2 Click Settings.
3 Select the checkboxes next to...
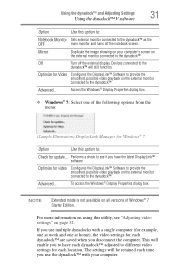
User Guide - Page 30

... of the following options from the menu:
(Sample Illustration) DisplayLink Manager for Windows® XP and Windows Vista®
Option
Use this option to:
Screen Resolution Change the resolution setting of the external monitor connected to the dynadock™. For more information, see "Supported display modes" on page 33.
Color Quality
Select 16-bit or 32-bit color...
User Guide - Page 31
... the DisplayLink™ Software to provide the smoothest possible video playback on the external monitor connected to the dynadock™.
Advanced...
To access the Windows® Display Properties dialog box.
NOTE
Extended mode is not available on all versions of Windows® 7 Starter Edition.
For more information on using this utility, see "Adjusting video settings" on page...
User Guide - Page 38
38
Using the dynadock™ and Adjusting Settings
Using standby/sleep/hibernation modes with the dynadock™
❖ In Extended mode, windows that were previously on the external monitor may appear on the computer's built-in display when the computer resumes from standby/sleep/hibernation. You may need to reposition the windows by dragging them to the external desktop again...
User Guide - Page 41

... to your computer with a USB cable and the computer is docked.
Refer also to the computer user's manual and to the external monitor's documentation.
No image displays on the external monitor connected to the dynadock™.
Try adjusting the resolution, contrast and or brightness controls on the external monitor.
Make sure the external display is not set to Off in the TOSHIBA Video...
User Guide - Page 43

... Control Center on my computer since I installed the dynadock™ display drivers and utility.
Some versions of ATI Catalyst Control Center are not supported by the dynadock™. Use Windows Display Properties and the Toshiba Video Dock Utility instead to control your display(s).
The external monitor
The monitor name displayed in the Windows® Device Manager
connected to the dynadock...
User Guide - Page 46

... exclamation points appear in the Windows® Device Manager next to one or more of the connected USB devices.
Make sure the dynadock™ is connected to your computer and the computer is docked.
Check that the cable connection between the USB port on the dynadock™ and the USB device is secure.
Make sure that the USB device drivers are properly installed. Refer to the operating...
User Guide - Page 47

... and Support
47
Toshiba Support
Problem(s)
The dynadock™ is not charging the USB device.
My real-time device (for example, a Web camera, microphone, or speakers) does not operate properly when connected to the dynadock™.
Solution(s)
Make sure that the USB device is connected to the front powered USB port. Make sure the AC adaptor is firmly connected to the dynadock™...
User Guide - Page 48

...
Before calling Toshiba, make sure you have:
❖ Your dynadock's serial number ❖ The computer and any optional devices related to the problem ❖ Backup copies of your Windows® operating system and all
other preloaded software on your choice of media
❖ Name and version of the program involved in the problem, if applicable, along with the installation media...