Celestron NexImage Solar System Imager driver and firmware
Drivers and firmware downloads for this Celestron item
Related Celestron NexImage Solar System Imager Manual Pages
Download the free PDF manual for Celestron NexImage Solar System Imager and other Celestron manuals at ManualOwl.com
User Guide - Page 2
... with all of the following:
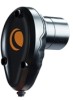
1.25" Barrel
USB Cable
1. Plug camera into the USB port of your computer.
Installation CD Rom
2. Double click the Amcap icon to start the program.
on your computer's desktop
3. Make sure "Preview" is selected from the Options menu. If "Preview" is not already selected (checked), click on it once.
4. Select an easy target like ...
User Guide - Page 3
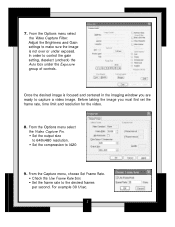
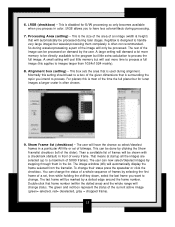
... or under exposed. In order to control the gain setting, deselect (uncheck) the Auto box under the Exposure group of controls.
Once the desired image is focused and centered in the imaging window you are ready to capture a video image. Before taking the image you must first set the frame rate, time limit and resolution for the video.
8. From the...
User Guide - Page 4
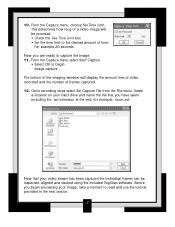
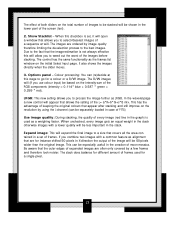
... menu select Start Capture
• Select OK to begin image capture.
The bottom of the imaging window will display the amount time of video recorded and the number of frames captured. 12. Once recording stops select Set Capture File from the File menu. Select
a location on your hard drive and name the file that you have taken including...
User Guide - Page 5
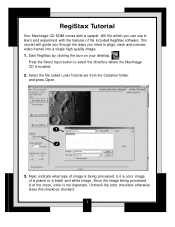
RegiStax Tutorial
Your NexImage CD ROM comes with a sample .AVI file which you can use to learn and experiment with the features of the included RegiStax software. This tutorial will guide you through the steps you need to align, stack and process video frames into a single high quality image. 1. Start RegiStax by clicking the icon on...
User Guide - Page 7

Alignment Page
Here you are presented with many different controls that are discussed in detail in the User's Guide. For this tutorial we will only discuss the most important features. On this screen you should see two smaller windows that are on top of the RegiStax Aligning window. One of them is the FFT-spectrum...
User Guide - Page 11
... purchase of the Celestron NexImage solar system imaging camera.
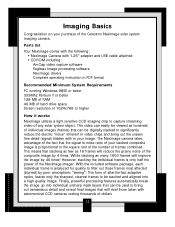
Parts list
Your NexImage comes with the following: • NexImage Camera with 1.25" adapter and USB cable attached • CD-ROM including: AmCap video capture software Registax image processing software NexImage drivers Complete operating instruction in PDF format
Recommended Minimum System Requirements
PC running Windows 98SE or...
User Guide - Page 12
... necessary. Refer to your telescopes owner's manual for instruction in collimating the optics.
Finding Objects
At first it can be difficult to locate individual planets due to their relative brightness. To make it easier to initially find your object in the imaging window, increase the brightness and gain controls under the Video Capture Filters menu. This...
User Guide - Page 15
...
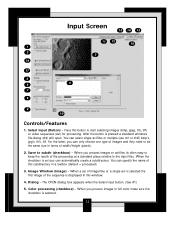
Controls/Features
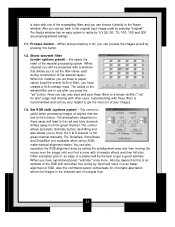
1. Select Input (Button) - Press this button to start selecting images (bmp, jpeg, fits, tiff) or video sequences (avi) for processing. After the button is pressed a standard windows ...textbox (default = processed)
3. Image Window (image) - When a set of image-files or a single avi is selected the first image of the sequence is displayed in this window.
4. Dialog - The OPEN dialog...
User Guide - Page 16
... stepping through them in the list. The image window (#3) will automatically display the frame selected from the framelist. To change their status press the spacebar or click the checkbox. You can change the status of a whole sequence of frames by selecting the first frame of a set, then while holding the shift-key down, select...
User Guide - Page 24
... LRGB. In the wavelet-page a new control will appear that allows the setting of the L= a*R+b*G+c*B mix. This has the advantage of keeping the original colours that appear after stacking and still improve on the resolution by using the L-channel (can be separately loaded in case of FITS)
Use image quality: During stacking, the quality of...
User Guide - Page 26
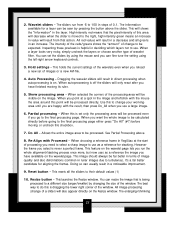
...set the sliders by using the mouse and you can fine tune the setting using the left-right arrow keyboard controls.
3. Hold settings - This holds the current settings of the wavelets even when you reload a new set of images... - This launches the Resize window. You can resize the image that is being processed to a different size (larger/smaller) by changing the size of the window. The best way to do...
User Guide - Page 27
... images at will by pressing this button.
12. Show wavelet filter (under options panel) - this opens the heart of the wavelet processing system. When checked you will be presented with a window that allows you to set the filter-values used during construction of the wavelet layers. When for instance you set these to equal values (load...
User Guide - Page 28
...image. When you have found one you like then turn over to manual. Now play with the slider belonging to the layer to refine the settings.
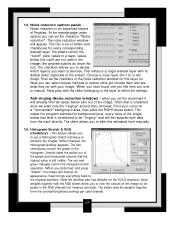
Anti-ringing (Noise reduction window) - when you set... manually.
15. Histogram Stretch & RGB (checkbox) - This feature allows you to use a Histrogram stretch technique to enhance the images. When checked, the Histrogram-window appears. The two checkboxes control ...
User Guide - Page 32
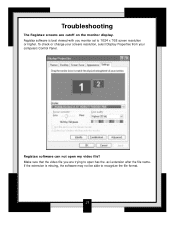
Troubleshooting
The Registax screens are cutoff on the monitor display. Registax software is best viewed with you monitor set to 1024 x 768 screen resolution or higher. To check or change your screens resolution, select Display Properties from your computers Control Panel.
Registax software can not open my video file? Make sure that the video file you are trying to open...
User Guide - Page 33
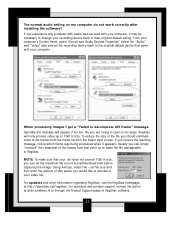
...normal audio setting on my computer do not work correctly after installing the software? If you experience any problems with audio devices used with your computer, it may be necessary to change your recording device back to their original default setting. From your computer's Control Panel, select "Sound and Audio Devices Properties" Select the "Audio" and "Voice" tabs and set the recording device...