Biostar M7NCD ULTRA driver and firmware

Related Biostar M7NCD ULTRA Manual Pages
Download the free PDF manual for Biostar M7NCD ULTRA and other Biostar manuals at ManualOwl.com
M7NCD Ultra user's manual - Page 1
...digital device, pursuant to Part 15 of the FCC Rules. These limits are designed to provide reasonable protection against harmful interference in a residential installation.... This equipment generates, uses and can radiate radio frequency energy and, if not installed and used in accordance with the instructions...content of this user's manual is subject to be changed without notice and we ...
M7NCD Ultra user's manual - Page 2
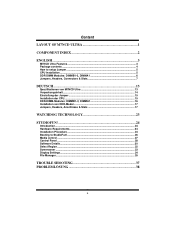
...von M7NCD Ultra 13 Verpackungsinhalt 14 Einstellung der Jumper 15 Installation der CPU 15 DDR-DIMM-Modules: DIMMB1-2, DIMMA1 16 Installation von DDR-Modul 17 Jumpers, Headers, Anschlüsse & Slots 17
WATCHDOG TECHNOLOGY 23
STUDIOFUN 24
Introduction...24 Hardware Requirements 24 Installation Procedure 24 Booting to StudioFun 26 Media control ...27 Control Panel ...28 Software Details...
M7NCD Ultra user's manual - Page 6
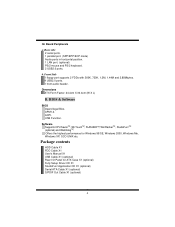
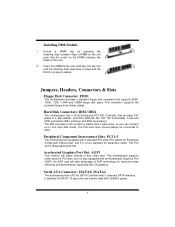
On Board Peripherals
a. Rear side 2 serial ports. 1 parallel port. (SPP/EPP/ECP mode) Audio ports in horizontal position. 1 LAN port. (optional) PS/2 mouse and PS/2 keyboard. 2 USB2.0 ports.
b. Front Side 1 floppy port supports 2 FDDs with 360K, 720K, 1.2M, 1.44M and 2.88Mbytes. 4 USB2.0 ports. 1 front audio header.
Dimensions ATX Form Factor: 24.4cm X 30.4cm (W X L)
B. BIOS & Software
BIOS Award ...
M7NCD Ultra user's manual - Page 7
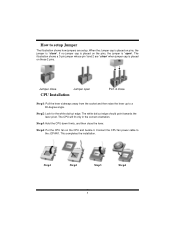
... white dot/cut edge should point towards the lever pivot. The CPU will fit only in the correct orientation.
Step3: Hold the CPU down firmly, and then close the lever.
Step4: Put the CPU fan on the CPU and buckle it. Connect the CPU fan power cable to the JCFAN1. This completes the installation.
Step1
Step2
Step3
Step4
5
M7NCD Ultra user's manual - Page 8
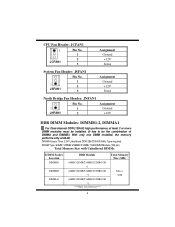
CPU Fan Header: JCFAN1
1
Pin No.
1
2
JCFAN1
3
Assignment Ground +12V Sense
System Fan Header: JSFAN1
Pin No.
1
1
2
JSFAN1
3
Assignment... DDR (128-bit) high performance, at least 2 or more DIMM modules must be installed. (It has to be the combination of DIMMA and DIMMB.) With only one DIMM installed, the memory performs only at 64-bit. DRAM Access Time: 2.5V Unbuffered DDR 266/333/400 ...
M7NCD Ultra user's manual - Page 9
... directly to that video card. This motherboard supports video cards for PCI slots, but it is also equipped with an Accelerated Graphics Port (AGP). An AGP card will take advantage of AGP technology for improved video efficiency and performance, especially with 3D graphics.
Serial ATA Connector: JSATA1/ JSATA2
The motherboard has a PCI to SATA Controller with 2 channels SATA interface. It satisfies...
M7NCD Ultra user's manual - Page 26
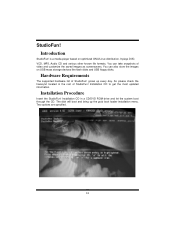
... also store the images on USB mass storage devices like flash disks and USB floppy disks.
Hardware Requirements
The supported hardware list of StudioFun! grows up every day. So please check the hwreq.txt located in the root of StudioFun! Installation CD to get the most updated information.
Installation Procedure
Insert the StudioFun! Installation CD in a CD/DVD ROM drive and let the system...
M7NCD Ultra user's manual - Page 27
... installed. The distribution currently supports PS/2, USB and Serial mice. In case of serial mouse you will have to move the mouse when prompted. The other two are probed and installed automatically.
The installation procedure will now finish, the CD is ejected and a dialog box prompting to reboot the machine is displayed. Press OK button and enjoy StudioFun!.
3.1.1 Error...
M7NCD Ultra user's manual - Page 28
Recovery
In case of a MBR corruption, this option should be used. It will automatically probe the hard disk master boot record and find out the installed operating system(s). On success it will re-install the boot loader with correct options in the MBR. Any custom boot loader option specified from other GNU/Linux installations will get over...
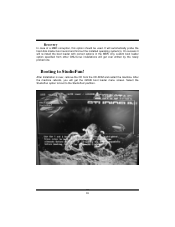
M7NCD Ultra user's manual - Page 29
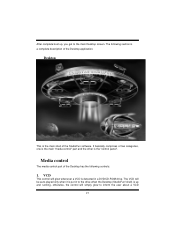
... the main shell of the StudioFun software. It basically comprises of two categories, one is the main "media control" part and the other is the "control panel".
Media control
The media control part of the Desktop has the following controls:
1. VCD
This control will glow whenever a VCD is detected in a DVD/CD-ROM drive. The VCD will be auto-played...
M7NCD Ultra user's manual - Page 30
... case if the user has both DVD/CD-ROM drive or else it will eject the default DVD/CD-ROM drive.
7. EXIT
This is the "Power on/off" control of the Desktop (StudioFun! shell).
Control Panel
Control panel part has five icons, which are shortcuts to other applications present in the StudioFun software. Tool tips are provided on the icons...
M7NCD Ultra user's manual - Page 32
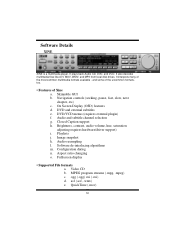
Software Details
XINE
XINE is a multimedia player. It plays back Audio CD, DVD, and VCD. It also decodes multimedia files like AVI, MOV, WMV, and MP3 from local disk drives. It interprets many of the most common multimedia formats available - and some of the uncommon formats, too.
• Features of Xine a. Skinnable GUI b. Navigation controls (seeking, pause...
M7NCD Ultra user's manual - Page 33
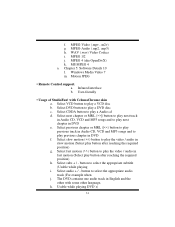
... j. MPEG 4 (aka OpenDivX) k. MS MPEG 4 a. Chapter 5: Software Details 10 l. Windows Media Video 7 m. Motion JPEG
• Remote Control support. a. Infrared interface b. User-friendly
• Usage of StudioFun! with CelomaChrome skin a. Select VCD button to play a VCD disc b. Select DVD button to play a DVD disc c. Select CDDA button to play a Audio cd d. Select next chapter or MRL (>>|) button...
M7NCD Ultra user's manual - Page 39
... the
power indicator lights are lit, hard drive is DIMM, press down firmly until the module
spinning.
snaps into place.
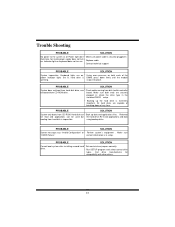
PROBABLE
SOLUTION
System does not boot from hard disk drive, can * Check cable running from disk to disk controller
be booted from CD-ROM drive.
board. Make sure both ends are securely
plugged in; check the drive type in the
standard CMOS setup...
M7NCD Ultra BIOS setup guide - Page 2
...-backed RAM so that it retains the Setup information when the power is turned off. The Award BIOS™ installed in your computer system's ROM (Read Only Memory) is a custom version of an industry standard BIOS. This means that it supports AMD® processor input/output system. The BIOS provides critical low-level support for standard devices such as disk drives and serial and parallel ports...
M7NCD Ultra BIOS setup guide - Page 4
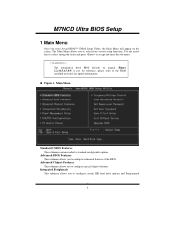
... Menu allows you to select from several setup functions. Use the arrow keys to select among the items and press to accept and enter the sub-menu.
!! WARNING !! The information about BIOS defaults on manual (Figure 1,2,3,4,5,6,7,8,9) is just for reference, please refer to the BIOS installed on board, for update information.
Figure 1. Main Menu
Standard CMOS Features...
M7NCD Ultra BIOS setup guide - Page 6
M7NCD Ultra BIOS Setup
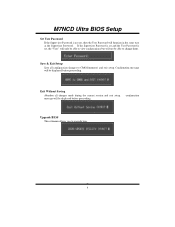
Set User Password If the Supervisor Password is not set, then the User Password will function in the same way as the Supervisor Password. If the Supervisor Password is set and the User Password is set, the "User" will only be able to view configurations but will not be able to change them.
Save & Exit Setup Save all configuration changes to CMOS...
M7NCD Ultra BIOS setup guide - Page 8
M7NCD Ultra BIOS Setup
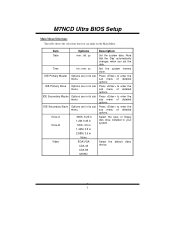
Main Menu Selections This table shows the selections that you can make on the Main Menu.
Item
Options
Description
Date
mm : dd : yy
Set the system date. Note that the 'Day' automatically changes when you set the date.
Time
hh : mm : ss
Set the system internal clock.
IDE Primary Master
Options are in its...
M7NCD Ultra BIOS setup guide - Page 13
M7NCD Ultra BIOS Setup
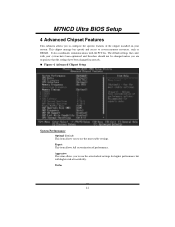
4 Advanced Chipset Features
This submenu allows you to configure the specific features of the chipset installed on your system. This chipset manage bus speeds and access to system memory resources, such as DRAM. It also coordinates communications with the PCI bus. The default settings that came with your system have been optimized and therefore should not be changed unless ...
M7NCD Ultra BIOS setup guide - Page 18
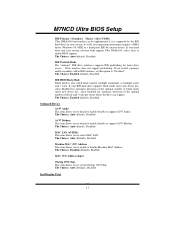
M7NCD Ultra BIOS Setup
IDE Primary / Secondary Master / Slave UDMA Ultra DMA/100 functionality can be implemented if it is supported by the IDE hard drives in your system. As well, your operating environment requires a DMA driver (Windows 95 OSR2 or a third party IDE bus master driver). If your hard drive and your system software both support Ultra DMA/100, select Auto to enable BIOS support. The ...