eMachines E191W driver and firmware


Related eMachines E191W Manual Pages
Download the free PDF manual for eMachines E191W and other eMachines manuals at ManualOwl.com
User Manual - Page 3
Contents
Using Your eMachines Flat-Panel Monitor 1
Unpacking the monitor 2 Setting up the monitor 2
Attaching the base 2 Connecting cables 3 Connecting a security cable 4 Turning on the monitor 4 Adjusting monitor settings 5 Monitor buttons 5 On-screen display options 6 Changing Windows screen settings 8 Power management 9 ENERGY STAR 9 Energy declaration 9 Maintaining 10 ...
User Manual - Page 9
... resolution.
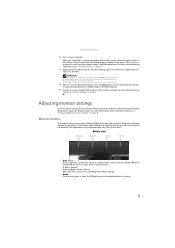
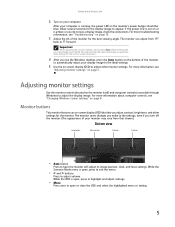
4 After you see the Windows desktop, press the Auto button on the bottom of the monitor
to automatically adjust your display image to the ideal settings.
5 Use the on-screen display (OSD) to adjust other monitor settings. For more information, see
"Adjusting monitor settings" on page 5.
Adjusting monitor settings
Use the monitor controls (located on the monitor itself) and computer...
User Manual - Page 12
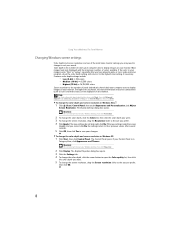
... click Help and Support. Type adjusting monitor settings in the Search Help box, then press ENTER.
To change the color depth and screen resolution in Windows Vista®:
1 Click (Start), Control Panel, then under Appearance and Personalization, click Adjust
Screen Resolution. The Display Settings dialog box opens.
Shortcut
You can also right-click on your Windows desktop, then click Personalize...
User Manual - Page 14
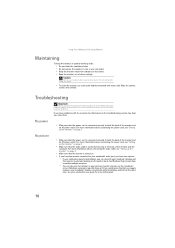
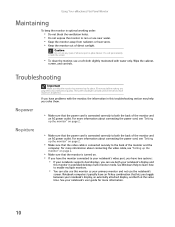
... cable, see "Setting up the monitor" on page 2.
• Make sure that the monitor is turned on.
• If you have the monitor connected to your notebook's video port, you have two options:
• If your notebook supports dual displays, you can use both your notebook's display and
this monitor in extended desktop multi-monitor mode. See Windows...
User Manual - Page 16
... is not available in the
Windows display control panel:
• Make sure that your video card can display at your monitor's native resolution. • This may be caused by older video drivers on your computer. See the eMachines support
Web site (www.emachines.com) for updated video drivers for your computer. You can also go directly to your video card's support Web site for the most...
User Manual - Page 21
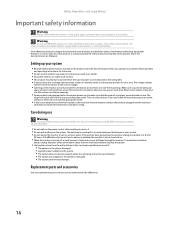
...Your eMachines ... set up your work...electrician to install the appropriate...modem cables from the wall outlets before cleaning the system. ■ Unplug the system from the wall outlet and refer servicing to qualified personnel if:
■ The power cord or plug is damaged. ■ Liquid has been spilled into the system. ■ The system does not operate properly when the operating instructions...
User Manual - Page 22
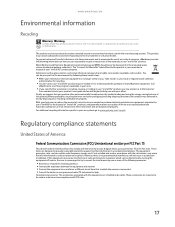
... a Class B digital device, pursuant to Part 15 of the FCC rules. These limits are designed to provide reasonable protection against harmful interference in a residential installation. This equipment generates, uses, and can radiate radio frequency energy and, if not installed and used in accordance with the instructions, may cause harmful interference to radio or television reception. However...
User Manual - Page 24
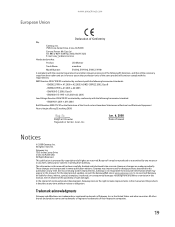
...Drive, Irvine, CA 92618
Contact Person: Mr. Easy Lai Tel: 886-2-8691-3089 Fax: 886-2-8691-3120 E-mail: [email protected]
Hereby declare that:
Product:
LCD Monitor
Trade Name:
emachine
Model Number:
E161HQ, E191HQ, E181H, E191W...is not responsible for inaccurate information which may appear in this manual. For the latest product updates, consult the Gateway Web site at www.gateway.com. In ...
User Manual - Page 3
Contents
Using Your eMachines Flat-Panel Monitor 1
Unpacking the monitor 2 Setting up the monitor 2
Attaching the base 2 Connecting cables 3 Connecting a security cable 4 Turning on the monitor 4 Adjusting monitor settings 5 Monitor buttons 5 On-screen display options 6 Changing Windows screen settings 8 Power management 9 ENERGY STAR 9 Energy declaration 9 Maintaining 10 ...
User Manual - Page 9
... resolution.
4 After you see the Windows desktop, press the Auto button on the bottom of the monitor
to automatically adjust your display image to the ideal settings.
5 Use the on-screen display (OSD) to adjust other monitor settings. For more information, see
"Adjusting monitor settings" on page 5.
Adjusting monitor settings
Use the monitor controls (located on the monitor itself) and computer...
User Manual - Page 12

... click Help and Support. Type adjusting monitor settings in the Search Help box, then press ENTER.
To change the color depth and screen resolution in Windows Vista®:
1 Click (Start), Control Panel, then under Appearance and Personalization, click Adjust
Screen Resolution. The Display Settings dialog box opens.
Shortcut
You can also right-click on your Windows desktop, then click Personalize...
User Manual - Page 14
... cable, see "Setting up the monitor" on page 2.
• Make sure that the monitor is turned on.
• If you have the monitor connected to your notebook's video port, you have two options:
• If your notebook supports dual displays, you can use both your notebook's display and
this monitor in extended desktop multi-monitor mode. See Windows...
User Manual - Page 16
... is not available in the
Windows display control panel:
• Make sure that your video card can display at your monitor's native resolution. • This may be caused by older video drivers on your computer. See the eMachines support
Web site (www.emachines.com) for updated video drivers for your computer. You can also go directly to your video card's support Web site for the most...
User Manual - Page 20
...Your eMachines ... set up your work...electrician to install the appropriate...modem cables from the wall outlets before cleaning the system. ■ Unplug the system from the wall outlet and refer servicing to qualified personnel if:
■ The power cord or plug is damaged. ■ Liquid has been spilled into the system. ■ The system does not operate properly when the operating instructions...
User Manual - Page 21
... a Class B digital device, pursuant to Part 15 of the FCC rules. These limits are designed to provide reasonable protection against harmful interference in a residential installation. This equipment generates, uses, and can radiate radio frequency energy and, if not installed and used in accordance with the instructions, may cause harmful interference to radio or television reception. However...
User Manual - Page 23
...Drive, Irvine, CA 92618
Contact Person: Mr. Easy Lai Tel: 886-2-8691-3089 Fax: 886-2-8691-3120 E-mail: [email protected]
Hereby declare that:
Product:
LCD Monitor
Trade Name:
emachine
Model Number:
E161HQ, E1911HQ, E181E, E191W...is not responsible for inaccurate information which may appear in this manual. For the latest product updates, consult the Gateway Web site at www.gateway.com. In...
Service Guide - Page 3
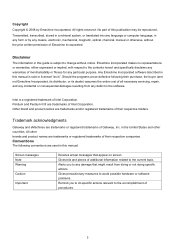
... a retrieval system, or translated into any language or computer language, in any form or by any means, electronic, mechanical, magnetic, optical, chemical, manual or otherwise, without the prior written permission of Emachine Incorporated.
Disclaimer
The information in this guide is subject to change without notice. Emachine Incorporated makes no representations or warranties, either expressed or...
Service Guide - Page 4
... the FRU list of this printed Service Guide. You MUST use the list provided by your regional Emachine office to order FRU parts for repair and service of customer machines.
Warning: (For FCC Certified Models)
This device has been tested and found to comply with the limits for a Class B digital device, pursuant to Part 15 of the...
Service Guide - Page 5
...power outlet as a safety feature. If your outlet does not accommodate the three-wire plug, have an electrician install the correct outlet, or use an adapter...servicing to qualified service personnel z To ensure satisfactory operation, use the monitor only with UL listed computers which have appropriate configured receptacles marked between 100 - 240V AC, Min. 5A. z The wall socket shall be installed...
Service Guide - Page 6
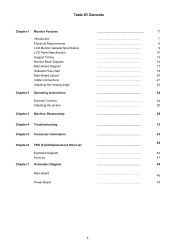
...Monitor Features Introduction Electrical Requirements LCD Monitor General Specification LCD Panel Specification Support Timing Monitor Block Diagram Main Board Diagram Software Flow chart Main Board Layout Cable Connections Adjusting the viewing angle
Chapter 2 Operating Instructions
External Controls Adjusting the picture
Chapter 3 Machine Disassembly
Chapter 4 Troubleshooting
Chapter 5 Connector...