Sony SDM-P232W - PREMIERPRO - 23" LCD Monitor driver and firmware

Related Sony SDM-P232W Manual Pages
Download the free PDF manual for Sony SDM-P232W and other Sony manuals at ManualOwl.com
Operating Instructions - Page 2
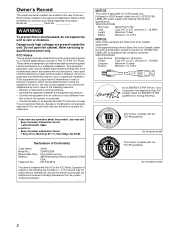
... this manual could void your authority to operate this equipment.
If you have any questions about this product, you may call: Sony Customer Information Center 1-800-222-SONY (7669)
or write to: Sony Customer Information Center 1 Sony Drive, Mail Drop #T1-11, Park Ridge, NJ 07656
Declaration of Conformity
Trade Name: Model No.: Responsible Party: Address:
Telephone No.:
SONY SDM-P232W Sony...
Operating Instructions - Page 3

... in each case in this manual.
Precautions 4 Identifying parts and controls 5
Setup 7
Setup 1: Connect a computer equipped with a DVI output connector (digital RGB 7
Setup 2: Connect a computer equipped with an HD15 output connector (analog RGB 7
Setup 3: Connect the power cord 8 Setup 4: Bundle the cords and cables 9 Setup 5: Turn on the monitor and computer 9 Setup 6: Adjust the tilt 10...
Operating Instructions - Page 4
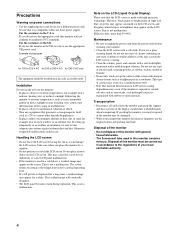
...; Note that material deterioration or LCD screen coating degradation may occur if the monitor is exposed to volatile solvents such as insecticide, or if prolonged contact is maintained with rubber or vinyl materials.
Transportation
• Disconnect all cables from the monitor and grasp the support and base sections of the display stand firmly with both hands...
Operating Instructions - Page 7

...8226; LCD display • Power cord • HD15-HD15 video signal cable (analog RGB) • DVI-D video signal cable (digital RGB) • Utility/Instruction Manual CD-ROM (utility software for
Windows/Macintosh, Operating Instructions) • Warranty card • Quick Setup Guide
Setup 1: Connect a computer equipped with a DVI output connector (digital RGB)
• Turn off the monitor and...
Operating Instructions - Page 9

...cables inside of the stand.
3 Replace the arm cover and back cover.
arm cover
1
Setup 5: Turn on the monitor and computer
1 Press the MAIN POWER switch on the right side of the monitor in the direction of the [. The 1 (power) indicator lights up in red.
MAIN POWER... page 11.
The installation of your monitor is complete. If necessary, use the monitor's controls to adjust the picture (page 12).
9
Operating Instructions - Page 10

... the video signal cable is properly connected. - Check that the input signal setting is correct by pressing the INPUT button (page 11).
• If "Not supported signal" appears on the screen, reconnect the old monitor. Then adjust the computer's graphics board within the following ranges.
Horizontal frequency
Vertical frequency
Resolution
Analog RGB 28-92 kHz
Digital RGB 28...
Operating Instructions - Page 14

... and press the OK button. The options are displayed on the popup menu.
4 Press the M/m ..., then press the OK button. The new color setting is stored in memory and automatically recalled whenever "User" is selected. The ...ROM software for photo images or illustrations.)
Notes • When you set "Zoom" on the OPTION menu to "Real," "Smoothing"
is not available. • 1920 × 1200 resolution...
Operating Instructions - Page 15

... picture's sharpness manually (Phase/Pitch) You can adjust the picture's sharpness as follows. This adjustment is effective when the computer is connected to the monitor's HD15 input connector (analog RGB).
1 Load the Utility Disk.
2 Start the Utility Disk and display the test pattern. For Windows Click [Utility] t [Windows]/[Win Utility.exe]. For Macintosh Click [Utility] t [Mac]/[Mac Utility...
Operating Instructions - Page 16

...picture's position manually (H Center /V Center) If the picture is not in the center of the screen, adjust the picture's centering as follows.
1 Set the resolution to 1920 × 1200 on the computer.
2 Load the Utility Disk.
3 Start the Utility Disk and display the test pattern. For Windows Click [Utility] t [Windows]/[Win Utility.exe]. For Macintosh Click [Utility] t [Mac]/[Mac Utility].
4 Press...
Operating Instructions - Page 20

... Hz (analog RGB), 60 Hz (digital RGB) Resolution: 1920 × 1200 or less
If using Windows,
• If you replaced an old monitor with this monitor, reconnect the old monitor and do the following. Select "SONY" from the "Manufacturers" list and select "SDM-P232W" from the "Models" list in the Windows device selection screen. If "SDM-P232W" does not appear in the "Models...