Edimax ES-5816P driver and firmware

Related Edimax ES-5816P Manual Pages
Download the free PDF manual for Edimax ES-5816P and other Edimax manuals at ManualOwl.com
Datasheet - Page 1


...through LAN cable. The ES-5816P can connect with different PoE products such as Access Points, IP cameras or IP phones...It is the best solution where the power outlets are difficult to install or the power outlets are far to the device.
No Special Networking Cable Required Just use the standard Cat-5 Ethernet cable to link between the ES-5816P and the powered devices (PE). This Ethernet cable can...
Datasheet - Page 2


... 802.3af Power over Ethernet IEEE 802.3 10Base-T Ethernet IEEE 802.3u 100BaseTX Fast Ethernet ANSI / IEEE 802.3 NWay auto-negotiation IEEE 802.3x Flow Control in full duplex
Collision / Carrier sense based backpressure in half duplex IEEE 802.1p QoS IEEE 802.1Q VLAN Tag Number of Ports: 16 PoE ports 10/100BaseT/T(X) MAC Address: 4K Buffer Memory: 156KB...
Manual - Page 4


Administrator: Authentication Configuration
1. Change the user name and the password. 2. Click "Update" to confirm the new change. Now, you can use the new user name and the password.
- 3 -
Manual - Page 5


Administrator: System IP Configuration
1. Change the IP address: type the new IP address or select DHCP IP configuration.
2. Click "Update" to confirm the new change. "Setting Process OK!!" will be shown on the screen.
Now, the setting of "System IP Configuration" is finished.
- 4 -
Manual - Page 6
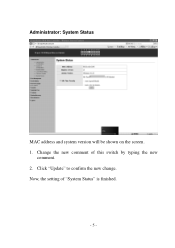

Administrator: System Status
MAC address and system version will be shown on the screen. 1. Change the new comment of this switch by typing the new
comment. 2. Click "Update" to confirm the new change. Now, the setting of "System Status" is finished.
- 5 -
Manual - Page 8
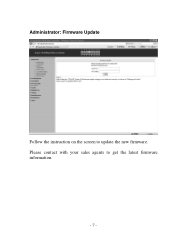

Administrator: Firmware Update
Follow the instruction on the screen to update the new firmware. Please contact with your sales agents to get the latest firmware information.
- 7 -
Manual - Page 11
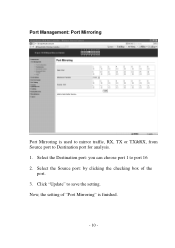

Port Management: Port Mirroring
Port Mirroring is used to mirror traffic, RX, TX or TX&RX, from Source port to Destination port for analysis. 1. Select the Destination port: you can choose port 1 to port 16 2. Select the Source port: by clicking the checking box of the
port. 3. Click "Update" to save the setting. Now, the setting of "Port Mirroring" is finished.
- 10 -
Manual - Page 12
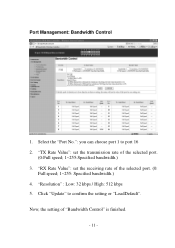

... can choose port 1 to port 16 2. "TX Rate Value": set the transmission rate of the selected port.
(0:Full speed; 1~255:Specified bandwidth.) 3. "RX Rate Value": set the receiving rate of the selected port. (0:
Full speed; 1~255: Specified bandwidth.) 4. "Resolution" : Low: 32 kbps / High: 512 kbps 5. Click "Update" to confirm the setting or "LoadDefault". Now, the setting of "Bandwidth Control" is...
Manual - Page 13


Port Management: Broadcast Storm Control
1. "Threshold" - Set the threshold from 1~63. 2. "Enable Port" - per port to define the status of broadcast packets. 3. Click "Update" to confirm the setting. Now, the setting of "Broadcast Storm Control" is finished.
- 12 -
Manual - Page 14
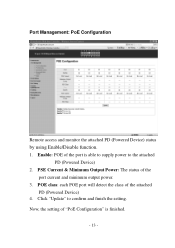

... function. 1. Enable: POE of the port is able to supply power to the attached
PD (Powered Device) 2. PSE Current & Minimum Output Power: The status of the
port current and minimum output power. 3. POE class: each POE port will detect the class of the attached
PD (Powered Device) 4. Click "Update" to confirm and finish the setting. Now, the setting of "PoE Configuration" is finished...
Manual - Page 16


VLAN Setting: VLAN Member Setting (Port Based)
You can select a port group. 1. Click the port numbers: which you want to put them into the
selected VLAN group. 2. Click "Update" to confirm and finish the setting. 3. Click "LoadDefualt" to back to the original factory setting. Now, the setting of "VLAN Mode" is finished.
- 15 -
Manual - Page 17
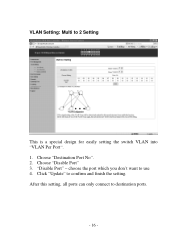

VLAN Setting: Multi to 2 Setting
This is a special design for easily setting the switch VLAN into "VLAN Per Port". 1. Choose "Destination Port No". 2. Choose "Disable Port" 3. "Disable Port" - choose the port which you don't want to use 4. Click "Update" to confirm and finish the setting. After this setting, all ports can only connect to destination ports.
- 16 -
Manual - Page 19


.... 2. "All-High-before-Low" - All packets will be assigned to either
Q2(high) piority queue or Q1(low) priority queue. 3. "4 Queue WRR (Weight-Round-Robin)" - set the ratio of the transmitting packet for the low priority to high priority. 4. Click...
Manual - Page 21
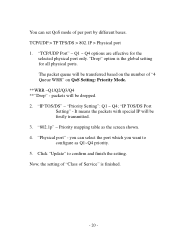

... Setting": Q1 ~ Q4; "IP TOS/DS Port
Setting" - It means the packets with special IP will be firstly transmitted. 3. "802.1p" - Priority mapping table as the screen shown. 4. "Physical port" - you can select the port which you want to configure as Q1~Q4 priority. 5. Click "Update" to confirm and finish the setting. Now, the setting of "Class of Service...
Manual - Page 22
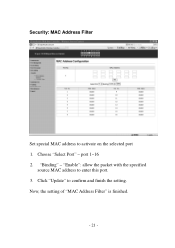

Security: MAC Address Filter
Set special MAC address to activate on the selected port 1. Choose "Select Port" - port 1~16 2. "Binding" - "Enable": allow the packet with the specified
source MAC address to enter this port. 3. Click "Update" to confirm and finish the setting. Now, the setting of "MAC Address Filter" is finished.
- 21 -
Manual - Page 24

... outgoing direction of the secure WAN port. If the condition matches, this packet will be dropped or forwarded. **Note 2: The description of Secure WAN port is shown on the bottom of this screen. 3. "Protocol" - choose protocols which you want. 4. Click "Update" to confirm and finish the setting. Now, the setting of "TCP/UDP Filter Configuration...
Manual - Page 25

... - Provides the length of time that
bridges should wait before transitioning to a new state after a topology change. (If a bridge transitions too soon, not all network links might be ready to change their state, and loops can result.) 6. Click "Update" to confirm and finish the setting. Now, the setting of "STP Bridge Settings" is finished.
- 24 -
Manual - Page 28


Backup/Recovery
Follow the instruction on the screen to update the original setting. "Backup" - Click "Download" to confirm the setting. "Recovery" - select a file and key in the password Click "Update"
to confirm the setting.
- 27 -
Manual - Page 29


... Queue Aging Time" - You can set queue aging time into different milliseconds or disable this function.
2. "VLAN Striding" - You can enable/disable this function. 3. "IGMP Snooping V1 & V2" - You can enable/disable this
function. 4. "VLAN Uplink Setting" - Set "uplink1 or uplink2" or "Clear
uplink1" or "Clear uplink2" 5. Click "Update" to confirm and finish the...

