Asus A7VL-VM driver and firmware


Related Asus A7VL-VM Manual Pages
Download the free PDF manual for Asus A7VL-VM and other Asus manuals at ManualOwl.com
Motherboard DIY Troubleshooting Guide - Page 2
... of Advanced Micro Devices, Inc. • Windows and MS-DOS ...ASUS. ASUS ASSUMES NO RESPONSIBILITY OR LIABILITY FOR ANY ERRORS OR INACCURACIES THAT MAY APPEAR IN THIS MANUAL, INCLUDING THE PRODUCTS AND SOFTWARE DESCRIBED IN IT.
Copyright © 2001 ASUSTeK COMPUTER INC. All Rights Reserved.
Product Name: ASUS A7VL-VM Manual Revision: 1.04 E726 Release Date: March 2001
2
ASUS A7VL-VM User's Manual
Motherboard DIY Troubleshooting Guide - Page 4

... Expansion Card Installation Procedure 22 3.7.2 Assigning IRQs for Expansion Cards 23
3.8 External Connectors 25
3.9 Starting Up the First Time 37
4. BIOS SETUP
39
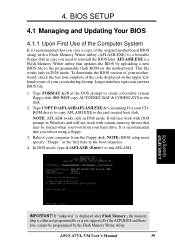
4.1 Managing and Updating Your BIOS 39 4.1.1 Upon First Use of the Computer System 39 4.1.2 Updating BIOS Procedures 40
4.2 BIOS Setup Program 42 4.2.1 BIOS Menu Bar 43 4.2.2 Legend Bar 43
4
ASUS A7VL-VM User's Manual
Motherboard DIY Troubleshooting Guide - Page 5
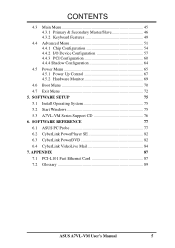
... Power Up Control 67 4.5.2 Hardware Monitor 69
4.6 Boot Menu 70
4.7 Exit Menu 72
5. SOFTWARE SETUP
75
5.1 Install Operating System 75
5.2 Start Windows 75
5.3 A7VL-VM Series Support CD 76
6. SOFTWARE REFERENCE
77
6.1 ASUS PC Probe 77
6.2 CyberLink PowerPlayer SE 82
6.3 CyberLink PowerDVD 82
6.4 CyberLink VideoLive Mail 84
7. APPENDIX
87
7.1 PCI-L101 Fast Ethernet Card...
Motherboard DIY Troubleshooting Guide - Page 7

.../33 devices
(1) Ribbon cable for one 5.25" and two 3.5" floppy disk drives
Optional Items
ASUS CIDB chassis intrusion detection module
ASUS IrDA-compliant infrared module
ASUS PCI-L101 Wake-On-LAN 10/ 100 Ethernet Card
(1) ASUS 2-port USB Connector Set
(1) Bag of spare jumper caps
(1) ASUS Support CD with drivers and utilities
(1) This Motherboard User's Manual
ASUS A7VL-VM User's Manual
7
Motherboard DIY Troubleshooting Guide - Page 9

... PCI transfers from PCI master busses to the memory and processor.
• Smart BIOS: 2Mb firmware provides Vcore and CPU/SDRAM frequency adjustments, boot block write protection, and HD/SCSI/MO/ZIP/CD/Floppy boot selection. Power supply autodetects to enable/disable suspend-to-RAM.
• Integrated Infrared (IrDA) Support: Integrated IR supports an optional remote control package for wireless...
Motherboard DIY Troubleshooting Guide - Page 10

... automated audio performance. (See 4.4.2: I/O Device Configuration in BIOS setup).
2.1.4 Performance Features
• Concurrent PCI: Concurrent PCI allows multiple PCI transfers from PCI master busses to the memory and processor.
• High-Speed Data Transfer Interface: IDE transfers using UltraDMA/33 Bus Master IDE can handle rates up to 33MB/s. This motherboard with its chipset and support...
Motherboard DIY Troubleshooting Guide - Page 16

...:
1. Check Motherboard Settings 2. Install Memory Modules 3. Install the Central Processing Unit (CPU) 4. Install Expansion Cards 5. Connect Ribbon Cables, Panel Wires, and Power Supply 6. Setup the BIOS Software
3.4 Motherboard Settings
This section explains in detail how to change your motherboard's function settings through the use of switches and/or jumpers.
WARNING! Computer motherboards and...
Motherboard DIY Troubleshooting Guide - Page 22

...3. Carefully align the card's connectors and press firmly. 4. Secure the card on the slot with the screw you removed above. 5. Replace the computer system's cover. 6. Set up the BIOS if necessary
(such as IRQ XX Reserved for Legacy Device: Yes in 4.4.3 PCI Configuration) 7. Install the necessary software drivers for your expansion card.
3. H/W SETUP Expansion Cards
22
ASUS A7VL-VM User's Manual
Motherboard DIY Troubleshooting Guide - Page 39
... disk. NOTE: BIOS setup must specify "Floppy" as the first item in the boot sequence.
4. In DOS mode, type A:\AFLASH to run AFLASH.
4. BIOS SETUP Updating BIOS
IMPORTANT! If "unknown" is displayed after Flash Memory:, the memory chip is either not programmable or is not supported by the ACPI BIOS and therefore, cannot be programmed by the Flash Memory Writer utility.
ASUS A7VL-VM User's Manual...
Motherboard DIY Troubleshooting Guide - Page 40
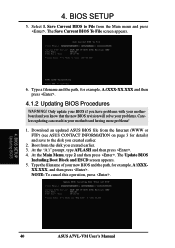
... disk you created earlier. 3. At the "A:\" prompt, type AFLASH and then press . 4. At the Main Menu, type 2 and then press . The Update BIOS Including Boot Block and ESCD screen appears. 5. Type the filename of your new BIOS and the path, for example, A:\XXXXX.XXX, and then press . NOTE: To cancel this operation, press .
4. BIOS SETUP Updating BIOS
40
ASUS A7VL-VM...
Motherboard DIY Troubleshooting Guide - Page 42

... make your selections among the predetermined choices.
To access the BIOS Setup program, press the key after the computer has run through its POST.
NOTE: Because the BIOS software is constantly being updated, the following BIOS screens and descriptions are for reference purposes only and may not reflect your BIOS screens exactly.
Program Information
4. BIOS SETUP
42
ASUS A7VL-VM User's Manual
Motherboard DIY Troubleshooting Guide - Page 46
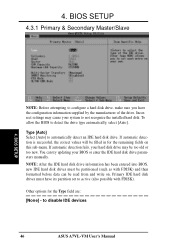
... entered into BIOS, new IDE hard disk drives must be partitioned (such as with FDISK) and then formatted before data can be read from and write on. Primary IDE hard disk drives must have its partition set to active (also possible with FDISK).
Other options for the Type field are:
[None] - to disable IDE devices
46
ASUS A7VL-VM User's Manual
Motherboard DIY Troubleshooting Guide - Page 65

... add the statement, DEVICE=C:\DOS\POWER.EXE, to your CONFIG.SYS file. For Windows 3.x and Windows 95, you need to install Windows with the APM feature. For Windows 98 and later, APM is automatically installed. A battery and power cord icon labeled "Power Management" will appear in the "Control Panel." Choose "Advanced" in the Power Management Properties dialog box.
ASUS A7VL-VM User's Manual
65
Motherboard DIY Troubleshooting Guide - Page 75
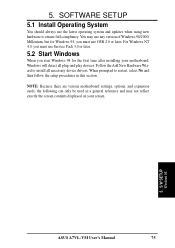
... to install all necessary device drivers. When prompted to restart, select No and then follow the setup procedures in this section.
NOTE: Because there are various motherboard settings, options, and expansion cards, the following can only be used as a general reference and may not reflect exactly the screen contents displayed on your screen.
5. S/W SETUP Windows 98
ASUS A7VL-VM User's Manual
75
Motherboard DIY Troubleshooting Guide - Page 76
... drive is drive D:).
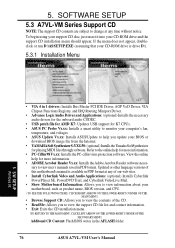
5.3.1 Installation Menu
5. S/W SETUP Windows 98
• VIA 4 in 1 drivers: Installs Bus Master PCI IDE Driver, AGP VxD Driver, VIA Chipset Functions Registry, and IRQ Routing Miniport Driver.
• Advance Logic Audio Driver and Applications: (optional) Installs the necessary audio drivers for the onboard audio CODEC.
• USB patch file for AMD K7: Updates USB support...
Motherboard DIY Troubleshooting Guide - Page 84
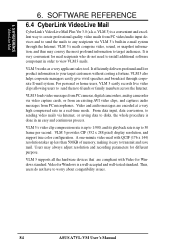
... of memory, making it easy to transmit and save mail. Users may always adjust resolution and recording parameters for different purpose.
VLM 3 supports all the hardware devices that are compliant with Video for Windows standard. Video for Windows is a well-accepted and well-tested standard. Thus, users do not have to worry about compatibility issues.
84
ASUS A7VL-VM User's Manual
Motherboard DIY Troubleshooting Guide - Page 85

... the environmental setting procedure.
6.4.2 CyberLink VideoLive Mail User Interface
Snapshot to File Video Configuration
Start Playback Stop Recording / Playback
Start Recording Pause
Exit Minimize Help Video Mail Wizard
Save Video File Send Mail
Load Video File
Send Mail Increase MIC volume Decrease MIC volume Increase speaker volume Decrease speaker volume
ASUS A7VL-VM User's Manual
85
Motherboard DIY Troubleshooting Guide - Page 88

7. APPENDIX ASUS LAN Card
7. APPENDIX
7.1.1 Features
• Intel 82558 Ethernet LAN Controller (Fully integrated 10BASE-T/100BASE-TX) • Wake-On-LAN Remote Control Function Supported • PCI Bus Master Complies to PCI Local Bus Rev. 2.1 specifications • Consists of MAC & PHY (10/100Mbps) interfaces • Complies to IEEE 802.3 10BASE-T and IEEE 802.3u 100BASE-TX interfaces &#...
Motherboard DIY Troubleshooting Guide - Page 90
... for the OS. Since the contents of flash ROM can be modified, users are able to update the BIOS by themselves.
IDE (Integrated Drive Electronics) IDE devices integrate the drive control circuitry directly on the drive itself, eliminating the need for a separate adapter card (in the case for SCSI devices). UltraDMA/ 33 IDE devices can achieve up to 33MB/Sec transfer.
90
ASUS A7V133 User's Manual
Motherboard DIY Troubleshooting Guide - Page 91
... user to change the card's IRQs and DMA in BIOS either automatically or manually.
POST (Power On Self Test) When you turn ON the computer, it will first run through the POST, a series of software-controlled diagnostic tests. The POST checks system memory, the motherboard circuitry, the display, the keyboard, the diskette drive, and other I/O devices.
PS/2 Port PS/2 ports are based on IBM...