Asus A7V-E driver and firmware

Related Asus A7V-E Manual Pages
Download the free PDF manual for Asus A7V-E and other Asus manuals at ManualOwl.com
Motherboard DIY Troubleshooting Guide - Page 2

... are released for each product design represented by the digit before and after the period of the manual revision number. Manual updates are represented by the third digit in the manual revision number.
For previous or updated manuals, BIOS, drivers, or product release information, contact ASUS at http://www.asus.com.tw or through any of the means indicated on the following...
Motherboard DIY Troubleshooting Guide - Page 4
... 20 3.5.2 Memory Installation 21
3.6 Central Processing Unit (CPU 23
3.7 Expansion Cards 24 3.7.1 Expansion Card Installation Procedure 24 3.7.2 Assigning IRQs for Expansion Cards 25 3.7.3 Accelerated Graphics Port (AGP 26
3.8 External Connectors 27
3.9 Starting Up the First Time 39
4. BIOS SETUP
41
4.1 Managing and Updating Your BIOS 41 4.1.1 Upon First Use of the Computer System...
Motherboard DIY Troubleshooting Guide - Page 5

... Menu 71
4.7 Exit Menu 73
5. SOFTWARE SETUP
75
5.1 Install Operating System 75
5.2 Start Windows 75
5.3 A7V-E Series Motherboard Support CD 76
6. SOFTWARE REFERENCE
79
6.1 ASUS PC Probe 79
6.3 CyberLink PowerDVD 84
6.2 CyberLink PowerPlayer SE 85
6.4 CyberLink VideoLive Mail 86
7. APPENDIX
89
7.1 PCI-L101 Fast Ethernet Card 89
7.2 Glossary 91
ASUS A7V-E User's Manual
5
Motherboard DIY Troubleshooting Guide - Page 7

... devices
(1) ATA/33 IDE ribbon cable (1) Ribbon cable for one 5.25" and
two 3.5" floppy disk drives
Optional Items
ASUS CIDB chassis intrusion detection module
ASUS IrDA-compliant infrared module
ASUS PCI-L101 Wake-On-LAN 10/ 100 Ethernet Card
(1) ASUS 2-port USB Connector Set
(1) Bag of spare jumper caps
(1) ASUS Support CD with drivers and utilities
(1) This Motherboard User's Manual
ASUS A7V...
Motherboard DIY Troubleshooting Guide - Page 9
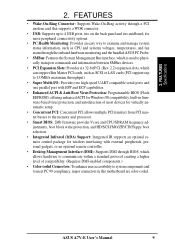
... can support Bus Master PCI cards, such as SCSI or LAN cards (PCI supports up to 133MB/s maximum throughput).
• Super Multi-I/O: Provides two high-speed UART compatible serial ports and one parallel port with EPP and ECP capabilities.
• Enhanced ACPI & Anti-Boot Virus Protection: Programmable BIOS (Flash EEPROM), offering enhanced ACPI for Windows 98 compatibility, built-in firmware...
Motherboard DIY Troubleshooting Guide - Page 10

... SCSI BIOS: Supports optional ASUS SCSI controller cards through the onboard SYMBIOS firmware.
2.1.3 Optional Components
• Realtek RTL8139C Ethernet: (optional) single chip fast ethernet controller for 100/10 Mbps capacity and supports WOL (Wake-on-LAN) feature. (See 4.4.2: I/O Device Configuration in BIOS setup).
• Onboard AC'97 Audio Controller: Supports advanced automated audio...
Motherboard DIY Troubleshooting Guide - Page 16

...:
1. Check Motherboard Settings 2. Install Memory Modules 3. Install the Central Processing Unit (CPU) 4. Install Expansion Cards 5. Connect Ribbon Cables, Panel Wires, and Power Supply 6. Setup the BIOS Software
3.4 Motherboard Settings
This section explains in detail how to change your motherboard's function settings through the use of switches and/or jumpers.
WARNING! Computer motherboards and...
Motherboard DIY Troubleshooting Guide - Page 24

....
3. Carefully align the card's connectors and press firmly. 4. Secure the card on the slot with the screw you removed above. 5. Replace the computer system's cover. 6. Set up the BIOS if necessary
(such as IRQ XX Reserved for Legacy Device: Yes in 4.4.3 PCI Configuration) 7. Install the necessary software drivers for your expansion card.
3. H/W SETUP Expansion Cards
24
ASUS A7V-E User's Manual
Motherboard DIY Troubleshooting Guide - Page 41

... disk. NOTE: BIOS setup must specify "Floppy" as the first item in the boot sequence.
4. In DOS mode, type A:\AFLASH to run AFLASH.
4. BIOS SETUP Updating BIOS
IMPORTANT! If "unknown" is displayed after Flash Memory:, the memory chip is either not programmable or is not supported by the ACPI BIOS and therefore, cannot be programmed by the Flash Memory Writer utility.
ASUS A7V-E User's Manual...
Motherboard DIY Troubleshooting Guide - Page 42

... disk you created earlier. 3. At the "A:\" prompt, type AFLASH and then press . 4. At the Main Menu, type 2 and then press . The Update BIOS Including Boot Block and ESCD screen appears. 5. Type the filename of your new BIOS and the path, for example, A:\XXXXX.XXX, and then press . NOTE: To cancel this operation, press .
4. BIOS SETUP Updating BIOS
42
ASUS A7V...
Motherboard DIY Troubleshooting Guide - Page 44

... want to enable the Security Password Feature or make changes to the power management settings. It will then be necessary to reconfigure your system using the BIOS Setup program so that the computer can recognize these changes and record them in the CMOS RAM of the EEPROM.
The EEPROM on the motherboard stores the Setup utility. When you start up...
Motherboard DIY Troubleshooting Guide - Page 48
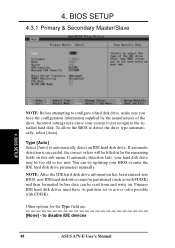
... entered into BIOS, new IDE hard disk drives must be partitioned (such as with FDISK) and then formatted before data can be read from and write on. Primary IDE hard disk drives must have its partition set to active (also possible with FDISK).
Other options for the Type field are:
[None] - to disable IDE devices
48
ASUS A7V-E User's Manual
Motherboard DIY Troubleshooting Guide - Page 54

... no matter whether you are using a USB device or not. Configuration options: [Disabled] [Enabled] [Auto]
OS/2 Onboard Memory > 64M [Disabled] When using OS/2 operating systems with installed DRAM of greater than 64MB, you need to set this option to [Enabled]; otherwise, leave this on [Disabled]. Configuration options: [Disabled] [Enabled]
Advanced Menu
4. BIOS SETUP
54
ASUS A7V-E User's Manual
Motherboard DIY Troubleshooting Guide - Page 67
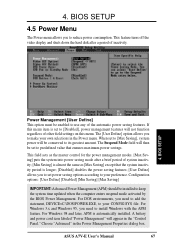
... to add the statement, DEVICE=C:\DOS\POWER.EXE, to your CONFIG.SYS file. For Windows 3.x and Windows 95, you need to install Windows with the APM feature. For Windows 98 and later, APM is automatically installed. A battery and power cord icon labeled "Power Management" will appear in the "Control Panel." Choose "Advanced" in the Power Management Properties dialog box.
ASUS A7V-E User's Manual
67
Motherboard DIY Troubleshooting Guide - Page 75
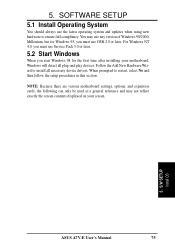
... to install all necessary device drivers. When prompted to restart, select No and then follow the setup procedures in this section.
NOTE: Because there are various motherboard settings, options, and expansion cards, the following can only be used as a general reference and may not reflect exactly the screen contents displayed on your screen.
5. S/W SETUP Install OS
ASUS A7V-E User's Manual
75
Motherboard DIY Troubleshooting Guide - Page 76
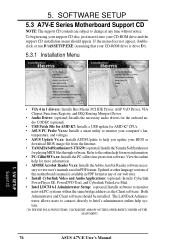
... your CD-ROM drive is drive D:).
5.3.1 Installation Menu
5. S/W SETUP Support CD
• VIA 4 in 1 drivers: Installs Bus Master PCI IDE Driver, AGP VxD Driver, VIA Chipset Functions Registry, and IRQ Routing Miniport Driver.
• Audio Driver: (optional) Installs the necessary audio drivers for the onboard audio CODEC (optional).
• USB Patch File for AMD K7: Installs a USB update for...
Motherboard DIY Troubleshooting Guide - Page 77

... hardware management features.
• ASUS BIOS Flash Utility for LDCM 6.1: (optional) Installs a utility that remotely flashes to a client PC's BIOS software when used in conjunction with Intel LDCM Administrator.
• Show Motherboard Information: Allows you to view information about your motherboard, such as product name, BIOS version, and CPU.
• Browse Support CD: Allows you to view...
Motherboard DIY Troubleshooting Guide - Page 80

7. APPENDIX ASUS LAN Card
7. APPENDIX
7.1.1 Features
• Intel 82558 Ethernet LAN Controller (Fully integrated 10BASE-T/100BASE-TX) • Wake-On-LAN Remote Control Function Supported • PCI Bus Master Complies to PCI Local Bus Rev. 2.1 specifications • Consists of MAC & PHY (10/100Mbps) interfaces • Complies to IEEE 802.3 10BASE-T and IEEE 802.3u 100BASE-TX interfaces &#...
Motherboard DIY Troubleshooting Guide - Page 82

... for the OS. Since the contents of flash ROM can be modified, users are able to update the BIOS by themselves.
IDE (Integrated Drive Electronics) IDE devices integrate the drive control circuitry directly on the drive itself, eliminating the need for a separate adapter card (in the case for SCSI devices). UltraDMA/ 33 IDE devices can achieve up to 33MB/Sec transfer.
92
ASUS A7V-E User's Manual
Motherboard DIY Troubleshooting Guide - Page 83

... user to change the card's IRQs and DMA in BIOS either automatically or manually.
POST (Power On Self Test) When you turn ON the computer, it will first run through the POST, a series of software-controlled diagnostic tests. The POST checks system memory, the motherboard circuitry, the display, the keyboard, the diskette drive, and other I/O devices.
PS/2 Port PS/2 ports are based on IBM...